
I have a new breakfast recipe for you all and it’s a cross between sweet and savory… they’re kind of like the popular egg muffins but they’re vegan of course. Today I bring you Vegan Winter Squash Frittata Breakfast Cups!

Ok, Liz, you’re off your rocker
What the heck are Frittata Breakfast Cups? So if a frittata is an Italian breakfast dish that’s like a crust-less quiche, then it stands to reason that if you put the filling in a muffin tin it would be a cup, yes? And eggs/egg substitutes are a popular breakfast dish. So voila?
I first made this winter squash breakfast dish as a full on frittata in a pie dish. It turned out pretty amazing. But I knew it would be better (because portability is an awesomeness multiplier) if I put the batter in a muffin tin so that I could take these suckers on the go.
They’re SO good, and the magic ingredient that gives these cups their egg-like texture and flavor is protein-packed and I’m not talking about tofu. Can you guess what it is?
So what’s in this thing?
The main ingredient in Winter Squash Frittata Breakfast Cups is (drumroll, please)… garbanzo bean flour! Also known as chickpea flour or besan/gram flour, it makes a fantastic base for egg when mixed with water and cooked.
The texture is springy, but firms up nicely. The flavor takes on anything you add to it, but has a natural eggy like flavor that is intensified if you add black salt (also known as kala namak). I also like to add nutritional yeast, turmeric, black pepper, and thyme to increase the savory flavor.
You can stuff just about anything you want in these easy breakfast cup things. I’ve tried them with roasted vegetables, summer squash, and winter squash. My absolute favorite thing to throw in them is delicata squash, which is what I’ve used in this recipe. But feel free to sub anything you like, just keep the proportions relatively the same.
How do I make them?
Don’t let the number of steps scare you off. These are actually pretty easy to make! And when the food is in the oven each time you can walk away and do other things–just set a timer! I like to use my phone because then I can hear it no matter which room I’m in.
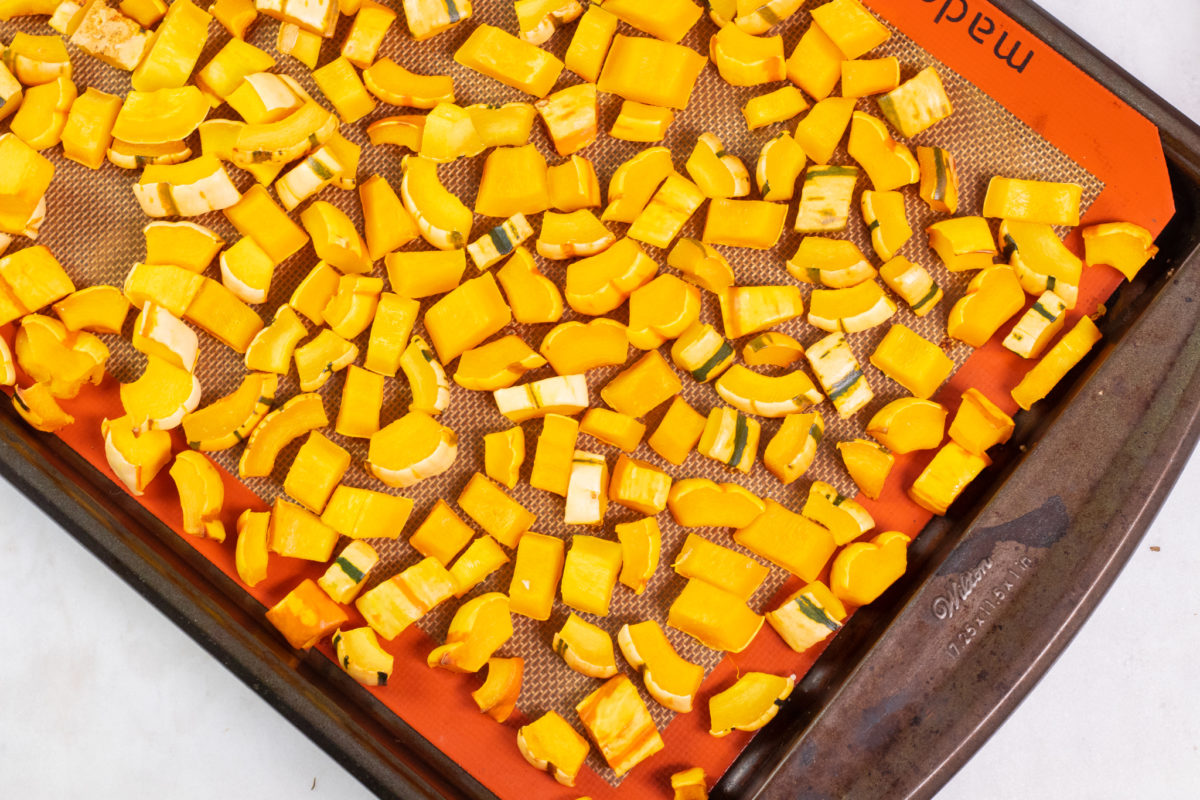
For the veggies/squash, roasting them will make them soft enough to eat once we bake the cups, but will also add a ton of flavor. I roast mine on half sheets lined with silicone mats. You can use parchment, but I feel like silicone mats help encourage the caramelization (oh come on, spell check, that’s a word!) process. Plus they save you money and help the environment!
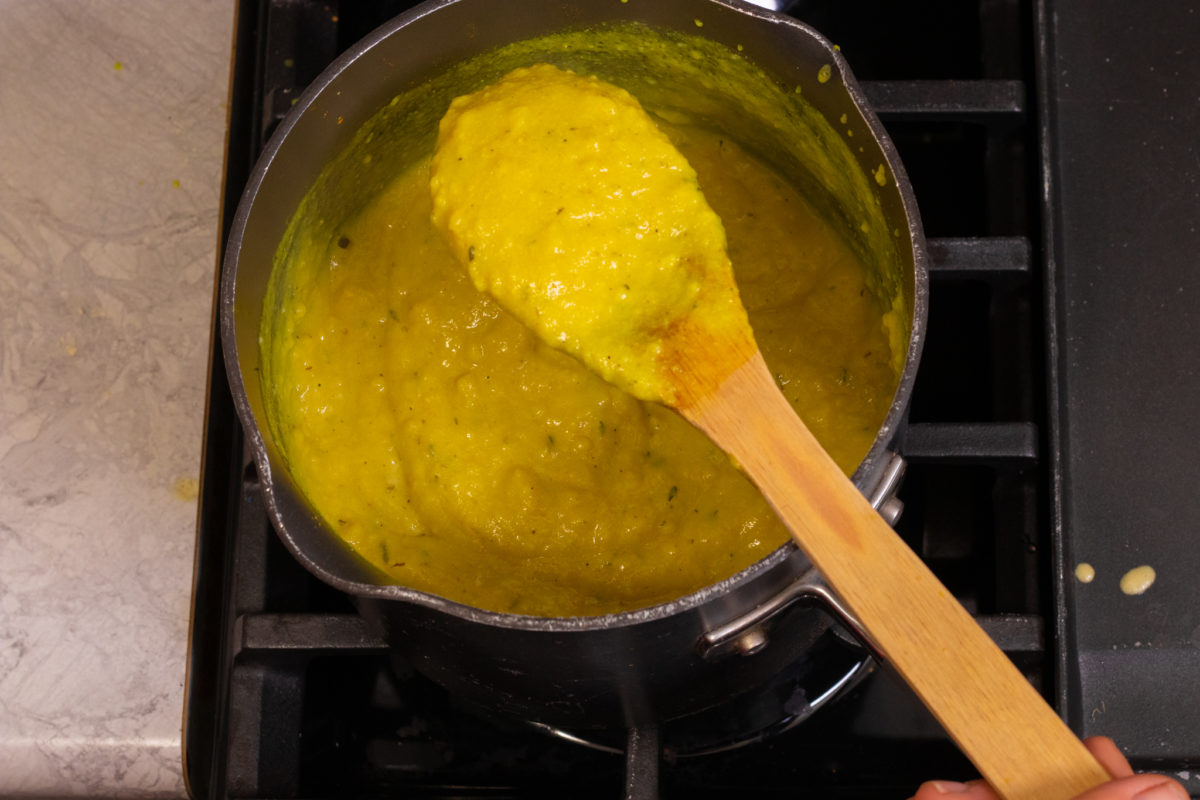
After you’ve roasted the veggies, you just have to assemble the batter. Start by boiling a mixture of water and spices. You’ll mix equal parts garbanzo bean flour and water with a whisk while you wait for that to boil, then you’ll add the flour mixture to the pot and simmer it for about 3-5 minutes, stirring until quite thick.
Baking the Muffins
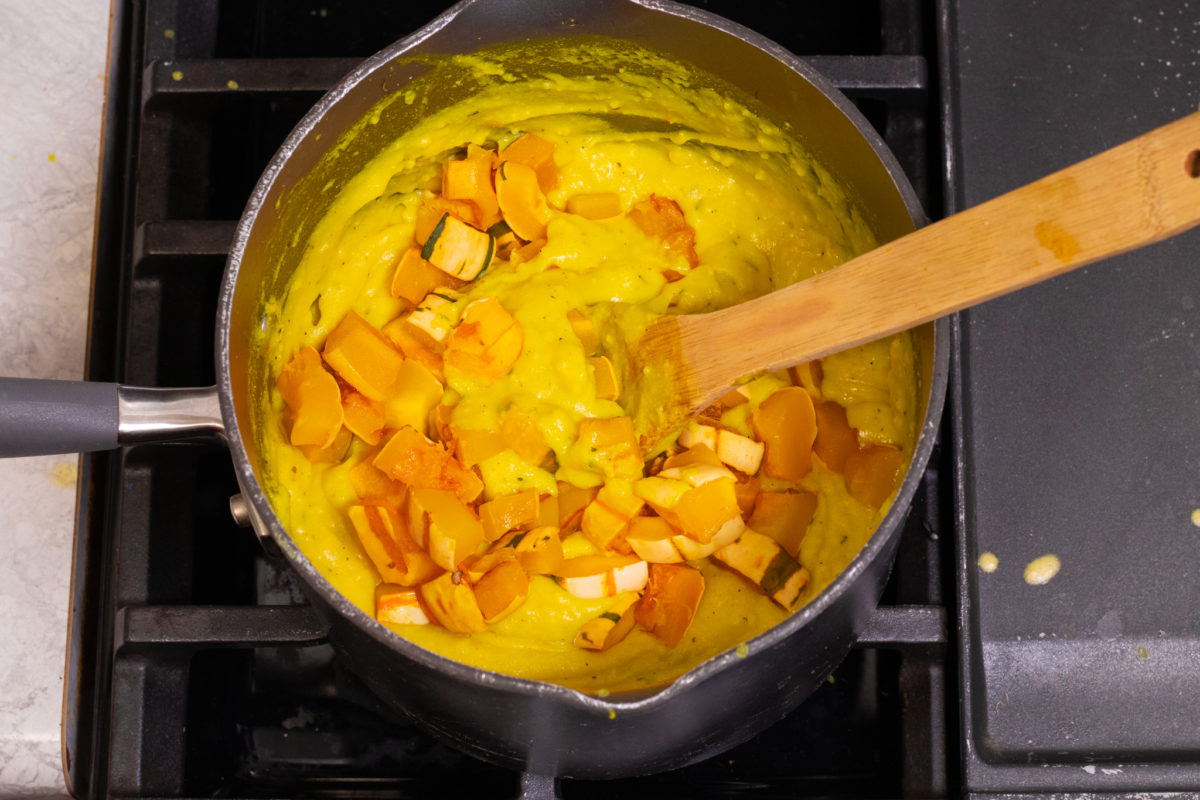
When the batter has come together, you’ll mix your squash or veggies through and remove it from heat. Then all you have to do is fill your muffin tin with the batter, place a tomato slice on top if desired, and bake until lightly golden brown and firm.
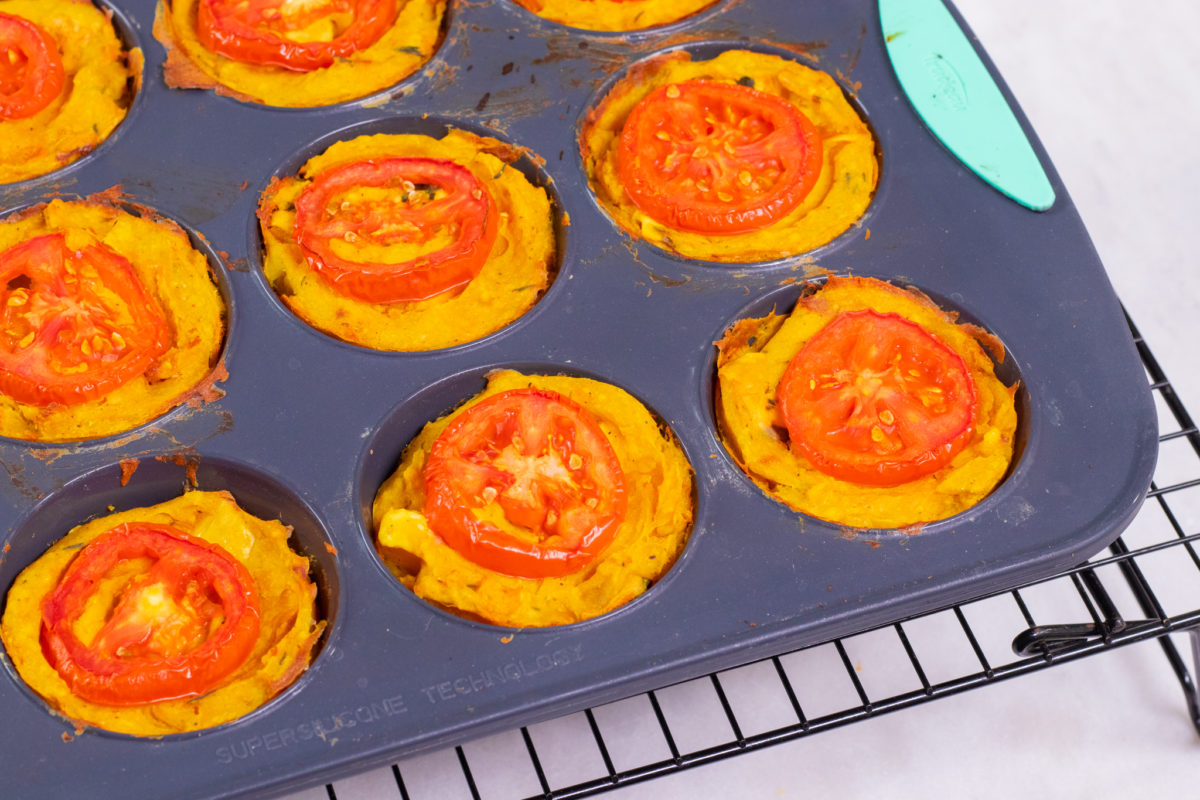
To save myself from using oil and struggling to get these out their tins, I LOVE using this silicone metal hybrid pan (I actually have two, since this recipe makes about 18 pieces). The base of the pan is metal so it’s easy to grip (and you don’t need to place a cookie sheet under it in the oven), but the cups are silicone. So after your frittata cups have cooled, just run a butter knife around the outer edge of each cup and push them out from the bottom of the pan.
Anything Else?
You can store these in the fridge for up to a week. They reheat wonderfully, and they also freeze quite well.These cups are also perfect for any other meal of the day. I’ve paired them with some rice and steamed greens for lunch or dinner, especially if I’m running around a lot or have a late night at work. They’re also perfect for school lunches and can be enjoyed hot or cold.
Some other places you could bring these:
- a potluck
- a sports-watching party (like the Superbowl)
- picnic
- on an airplane (most domestic US flights allow food, just nothing over 3oz that’s a liquid, paste, or gel)
- to snack on at the movies (shh)
- on a road trip
- camping
- hiking (extra protein!)
As always, let me know if you make this recipe and please tag #Zardyplants and mention me @Zardyplants so I can see your beautiful recreations! If you tag me on IG, I will share your post in my stories :)
<3 Liz

Follow me on Social Media!

Vegan Winter Squash Frittata Breakfast Cups
- Total Time: 1 hour, 10 minutes
- Yield: 18 cups 1x
Description
When you need a need your sushi fix but don't have time, Customizable Sushi Bowls can make for a healhy meal. With premade rice you can enjoy them all week! Gluten-Free, Nut-Free, Soy-Free
Ingredients
- 3 cups roasted veggies or squash (I used 2 large delicata squash and diced them)
- 12 thin slices of tomato (I used roma, but you could also use a halved cherry tomato)
- 1.5 cups chickpea flour
- 1.5 cups water for the flour
- 3 cups water for boiling
- 4 tablespoons nutritional yeast
- 1 teaspoon onion powder
- 1 teaspoon garlic powder
- 1 teaspoon turmeric
- ½ teaspoon dried thyme
- ½ teaspoon black pepper
- ½ teaspoon pink Himalayan salt (or any salt)
Instructions
- Roast veggies for approximately 35 minutes at 400 degrees F (or 200 degrees C). You may need to adjust this time depending on the size of your veggies and what kind they are. Mushrooms, bell peppers, broccoli etc. will require less time than squash, potato, etc. Just roast them till they're soft enough to eat. Set aside and leave your oven on (at the same temperature) as we'll be using it again shortly.
- In a large saucepan, add 3 cups of water, onion powder, garlic powder, turmeric, thym, pepper, and salt(s). Bring to a boil.
- While the water is coming to a boil, mix together the 1.5 cups garbanzo flour with an equal amount of water. Whisk it until completely combined.
- When the water has come to boil, add in the nutritional yeast and the garbanzo flour and water mixture. Turn heat down to a simmer. Let simmer for 3-5 minutes, stirring constantly, until mixture is thick. Remove from heat and stir in veggies until everything is coated.
- Spoon the mixture into each muffin cup, almost filling the whole cup. Leave about ¼" at the top and place a sliced tomato on top, pressing in gently.
- Bake for about 35 minutes (400 degrees F / 200 degrees C), until the tomato and edges of the cups have turned light golden brown. They should be mostly firm to the touch, but will firm up more as they cool. Remove from the oven and let cool completely.
- To release from a silicone muffin tin, run a butter knife around the edges of each cup. Then simply press your fingers on the bottoms of each cup and push upward. Each cup should release easily. If they do not, coax them with the butter knife, but I've never had an issue.
- Serve or refrigerate in an airtight contained up to a week.
- Prep Time: 10 minutes
- Cook Time: 1 hour
- Category: Breakfast, Snack
- Method: Oven
- Cuisine: Breakfast, Frittata, Vegan

Carol Howell
Such an ingenious idea! Can't wait to try.
Laura Kynnersley
Sound yummy! You mentioned Black Salt for an eggy flavour. Do you not use it in this recipe?
💚 Liz
Hi! Thanks for your comment. I didn't use black salt in this recipe because I actually never liked the "eggy* taste of eggs, lol, but for people who miss that flavor, I've read that it makes a big difference in your food tasting like eggs! If you do want to use it in this recipe, I'd start with half a teaspoon and then taste it. Add more if you need to. And I wouldn't use it in place of regular salt. Hope that helps!
-Liz
Sherri Rampton
You say to bake these cups for 35 minutes, but at what temperature? 350? 375? 400?
Thanks.
💚 Liz
Hi! Thanks so much for your comment, I've made it more clear in the instructions now--everything should be updated. You should leave your oven at 400 degrees after you've roasted your veggies. You'll then prepare the mixture and prepare the cups, then stick them back in the 400 degree oven.