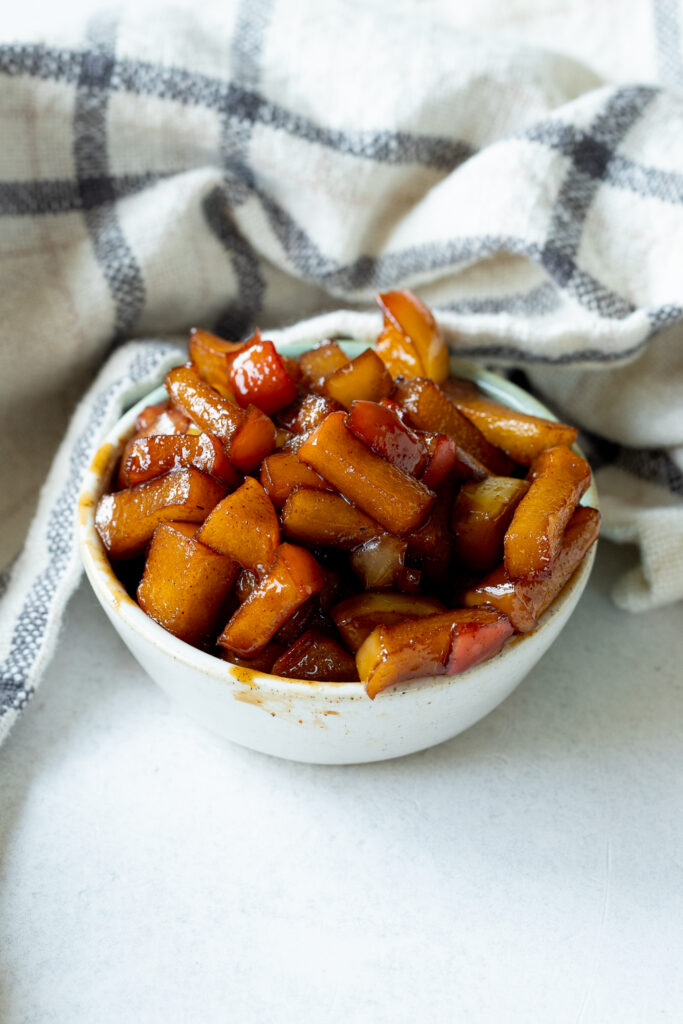
Soft, sweet, and the perfect addition to any dessert (or breakfast!), these caramelized apples are absolutely delicious on top of pudding, cake, oatmeal, pancakes, yogurt, or even on their own. This recipe is vegan, takes only 4 ingredients, and is ready in under 10 minutes.
This post may contain affiliate links. See our disclosure policy for details.
Hey Internet, I’ve been making these caramelized apples for years. I always put them on my vegan apple cake and recently I’ve been putting them in my chia pudding recipes, and especially on my apple pie chia pudding. But I never had a recipe written out for them because I didn’t think about it.
However I have recently been getting more questions about them so I decided they’re so fantastic, they deserve their own post.
And now I’m thinking about all kinds of other foods I could put them on. In the spirit of oatmeal, for my e-book Plant Based Jewish Recipes (volume 1 because I am working on a second volume!) there’s a recipe for an apples and “honey” quinoa bowl that is similar to oatmeal and is topped with these amazing caramelized apples.
I’m not a person who is super excited about traditional oatmeal, but I have asked people who do like oatmeal (like my mom). They agreed they would love to put caramelized apples on top of it, especially with a scoop of almond butter.
This definitely goes perfectly with my growing collection of vegan apple recipes like my vegan apple cake I already mentioned, my Instant Pot apple butter, apple butter thumbprint cookies, apple juice-based vegan honey, apple pie baked oatmeal, and more. I also have my family’s fabulous vegan applesauce recipe printed in my Plant Based Jewish Recipes e-book if you’re interested in that.
Anyway, I digress. Caramelized apples are SO easy and SO delicious that you will want to put them on everything.
Why This Recipe Works
This recipe is super simple. We’re going to make caramelized apples on the stovetop in a nonstick skillet, but you could also do it on a griddler or similar. While it’s possible to make them in the oven, it would be more like roasted or baked apples than caramelized, since you’re not able to stir them very frequently.
But depending on the size of your cut apples, this recipe will take between 5 and 10 minutes to make, so it’s pretty quick to do.
So we’ll start with some freshly cut apples. Because apples oxidize so quickly, I recommend actually prepping the other ingredients first, and then getting the apples into the pan as soon as possible.
You can cut your apples in any way you’d like, just try to keep them all relatively uniform so they cook at the same rate. For a pretty presentation like on my vegan apple cake, I peeled and sliced my apple into thin crescent-ish shapes. For this recipe, I simply finely diced them so I could sprinkle them over my apple pie chia pudding.
The other ingredients are simple: some kind of sugar (solid sugars like cane, brown, and coconut sugar work best), cinnamon, and lemon juice or water.
The lemon juice or water help the syrup-y consistency come together and prevent the apples from burning or drying out while they caramelize. I like the lemon juice because it balances the sweetness, but I promise these are not sour or tart in any way. Water is also fine.
For the sugar, I highly recommend using the coconut sugar. It has a very warm and toasty sweetness that goes perfectly with the apples and cinnamon flavor, and really makes me think “fall.” Coconut (palm) sugar can be found in the baking aisle of most grocery stores nowadays, but if you prefer to use organic brown sugar or organic cane sugar, that’s totally fine.
I do mention organic as, at least in the United States, some conventional sugars are made using animal byproducts (animal bone char is used in the filtering process). Organic is usually a safe bet, but you can also always research the brand you’re looking at and you can usually find an answer.
Maple syrup and similar will work, however I would skip the lemon juice/water, and the apples will have a slightly less caramelized texture, however they will still be soft, sweet, and delicious.
You will want to put these caramelized apples on everything, so let’s get started.
Never miss a recipe! Join my mailing list to receive a free copy of my e-book on my go-to plant based recipes as well as vegan tips, NEW recipes straight to your inbox. I will NEVER spam you or sell your information.
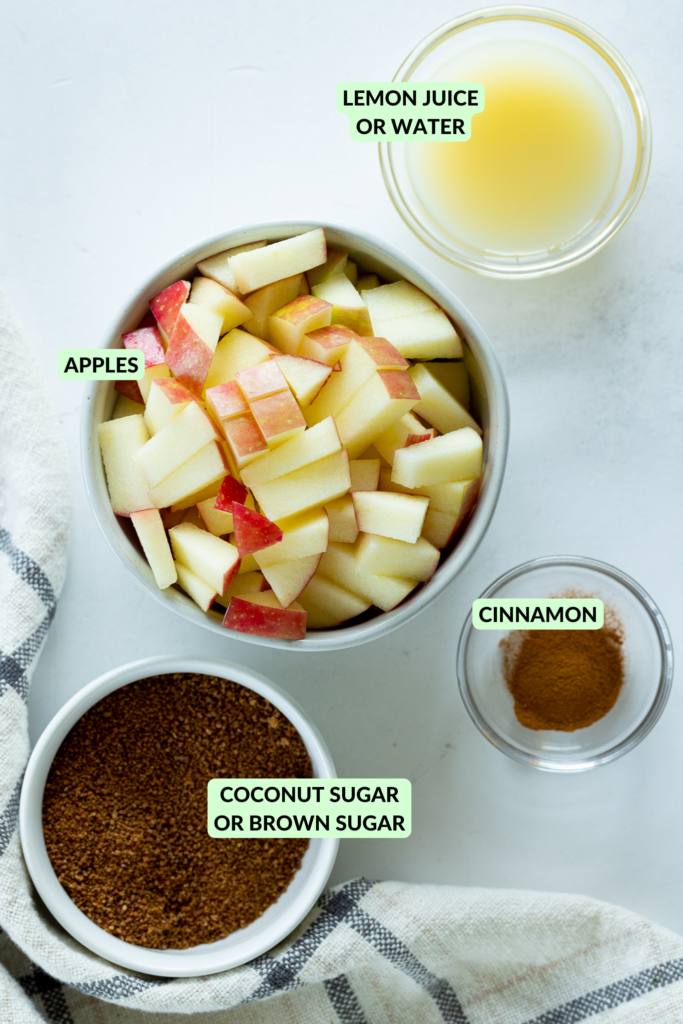
Ingredients and Substitutions
- 1 medium apple (about 1 ¼ cups chopped): Depending on how you want to serve your caramelized apples, you can chop them how you like. On top of a cake? Try peeling it and thinly slicing the wedges after coring it. On top of oatmeal or another item in a bowl or jar? Try dicing it. For this I left the skins on, but you can peel if you want to. I would use a sweet, firm apple variety.
- 2 tablespoons lemon juice or water: A little liquid helps keep the apples from burning or drying out while they caramelize. The lemon juice really balances out the sweetness of all the sugar without making the caramelized apples taste tart or sour. However, water will also work.
- 2 to 4 tablespoons coconut sugar or other sugar: Depending on how much syrup you want at the end (the sauce around the caramelized apples), you can use between 2 and 4 tablespoons of sugar. I prefer to use coconut sugar for this recipe because the warm and toasty flavor of it goes so well with the caramelized apples. Organic or brown or cane sugar will also work (I recommend brown sugar). Liquid sugars like maple syrup or agave will work but will make your apples less caramelized. Avoid sugar substitutes as I have not tested them and cannot recommend them.
- ¼ teaspoon ground cinnamon: You can add more to taste, but I never feel the need to.

How to Make Caramelized Apples
- Because apples oxidize (brown) quickly, I recommend getting all your other ingredients out first.
- Heat a large nonstick skillet over medium heat. Add the chopped apples and spread them out in a single layer (but they can be close together) with a spatula.
- Pour the lemon juice or water over the apples and stir so they all get coated.
- Sprinkle on the sugar and cinnamon, and stir again so all the apple pieces are coated.
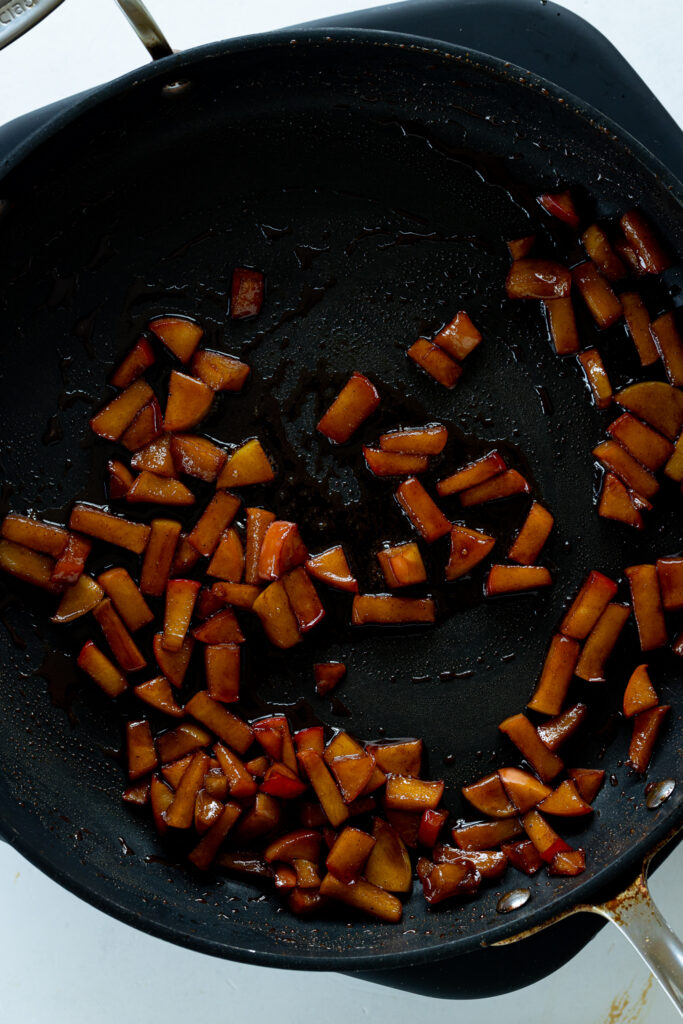
- Cook over medium heat for around 5 minutes, stirring frequently (at least once a minute, but preferably twice). Depending on the size of the chopped apples, they make take more or less time to cook.
- Caramelized apples are done when they are soft, browned, and coated with a thick and sticky syrup like sauce.
- Serve immediately (best), or let cool slightly if topping a cake. You can store leftover caramelized apples in the refrigerator in an airtight container for 1-2 days, but any more than that and they start to degrade. I recommend eating up the leftovers on oatmeal, apple pie chia pudding, vegan yogurt, or with a spoon as we like to do. If warming the leftovers, I recommend gently microwaving in the dish (uncovered) for 20-30 seconds or in a nonstick skillet over medium low heat.
Did you know I have books? Visit my shop page to see the various e-books I have available. My best seller is Plant-Based Jewish Recipes, and I’m in the middle of a second volume of that as well as a new book in the works that focuses on one of my favorite gluten-free vegan proteins.
Frequently Asked Questions
I would use a firm (not mealy) and sweet apple. I think this recipe might be more tart if you use a granny smith apple, however if that’s what you’re going for, be my guest. I like to use gala, fuji, rave, or honeycrisp for this recipe.
Nope. I don’t unless I’m serving them on a cake and I want the appearance to be delicate and pretty. The color of the skin doesn’t stay (it turns brown like the rest of the apple in the caramelization process).
Yes, but your caramelized apples will be a little more liquidy and less sticky, if you know what I mean. They should still taste good. I would skip the lemon juice/water if using a liquid sweetener.
No, I have not tested this and I’m not sure it will work. It’s the sugars that actually caramelize. You’re welcome to try it, but please do not come say my recipe doesn’t work if you’re not using real sugar. This is meant to be a treat, not a diet food.
I think they’re best fresh, and since they take less than 10 minutes to make, I do not recommend making them in advance. If you absolutely have to, make them no more than 1 day in advance, and when you’re ready to serve them either let them come to room temperature or reheat gently in the microwave or over a medium low flame in a nonstick skillet.
Pro Tips for Success
- Use a sweet and firm apple like gala, honeycrisp, rave, fuji, etc.
- Use a solid sugar like coconut sugar, brown sugar, or cane sugar, for the quickest and most delicious results.
- Coconut sugar is the best sugar for this because it has a warm and toasty flavor that goes very well with the apples and cinnamon. My next preference would be brown sugar, followed by regular cane sugar.
- Prep the other ingredients before you chop the apple so it doesn’t have time to oxidize.
- Make the caramelized apples just before serving them; they’re best fresh.
More Recipes Like This
Apple recipes are great any time of year, but especially during fall. A few of my favorites:
- Vegan Apple Pie Chia Pudding
- Vegan Apple Cake
- Instant Pot Apple Butter
- Vegan Apple Pie Baked Oatmeal
- Apple juice based Vegan Honey
- Vegan Apple Butter Thumbprint Cookies
- Roasted Apple Brussels Sprouts
- Vegan Baked Apples with Candied Pecans and Tahini Dressing (coming soon in Plant Based Jewish Recipes Volume 2! Sign up to be notified when it drops.)
Follow me on Instagram, Facebook, TikTok, Pinterest, or YouTube for more vegan tips, recipes, and to see all my recipe videos (I even have recipes not on the blog!).
Print
Caramelized Apples
- Total Time: 5 minutes
- Yield: 1 cup 1x
- Diet: Vegan
Description
Soft, sweet, and the perfect addition to any dessert (or breakfast!), these 5-minute caramelized apples are delicious and easy to make.
Ingredients
- 1 medium apple (about 1 ¼ cups chopped)
- 2 tablespoons lemon juice or water (see note 2)
- 2 to 4 tablespoons coconut sugar or other solid sugar (see note 3)
- ¼ teaspoon ground cinnamon, or more to taste
Instructions
- Note about prep: Because apples oxidize (brown) quickly, I recommend getting all your other ingredients out first.
- Note about apple cuts: Depending on how you want to serve your caramelized apples, you can chop them how you like. On top of a cake? Try peeling it and thinly slicing the wedges after coring it. On top of oatmeal or another item in a bowl or jar? Try dicing it. For this I left the skins on, but you can peel if you want to. I would use a sweet, firm apple variety.
- Add apples: Heat a large nonstick skillet over medium heat. Add the chopped apples and spread them out in a single layer (but they can be close together) with a spatula.
- Add liquid: Pour the lemon juice or water over the apples and stir so they all get coated.
- Sprinkle on the sugar and cinnamon, and stir again so all the apple pieces are coated.
- Cook over medium heat for around 5 minutes, stirring frequently (at least once a minute, but preferably twice). Depending on the size of the chopped apples, they make take more or less time to cook.
- How to know they’re done: Caramelized apples are done when they are soft, browned, and coated with a thick and sticky syrup like sauce.
- Serve immediately (best), or let cool slightly if topping a cake.
- Storage option: You can store leftover caramelized apples in the refrigerator in an airtight container for 1-2 days, but any more than that and they start to degrade. I recommend eating up the leftovers on oatmeal, apple pie chia pudding, vegan yogurt, or with a spoon as we like to do. If warming the leftovers, I recommend gently microwaving in the dish (uncovered) for 20-30 seconds or in a nonstick skillet over medium low heat.
Notes
- Note 1: I would use a firm (not mealy) and sweet apple. I chose gala apples, however fuji, rave, honeycrisp, etc. are all good options. If your apple is very large you may need more sugar. I think this recipe might be more tart if you use a granny smith apple, however if that’s what you’re going for, be my guest.
- Note 2: A little liquid helps keep the apples from burning or drying out while they caramelize. The lemon juice really balances out the sweetness of all the sugar without making the caramelized apples taste tart or sour. However, water will also work.
- Note 3: Depending on how much syrup you want at the end (the sauce around the caramelized apples), you can use between 2 and 4 tablespoons of sugar. I prefer to use coconut sugar for this recipe because the warm and toasty flavor of it goes so well with the caramelized apples. Organic or brown or cane sugar will also work (I recommend brown sugar). Liquid sugars like maple syrup or agave will work but will make your apples less caramelized. Avoid sugar substitutes as I have not tested them and cannot recommend them.
- Cook Time: 5 minutes
- Category: Topping
- Method: Stove Top
- Cuisine: Ingredient
Keywords: Caramelized Apples, Dessert Toppings


Layla
Amazing
★★★★