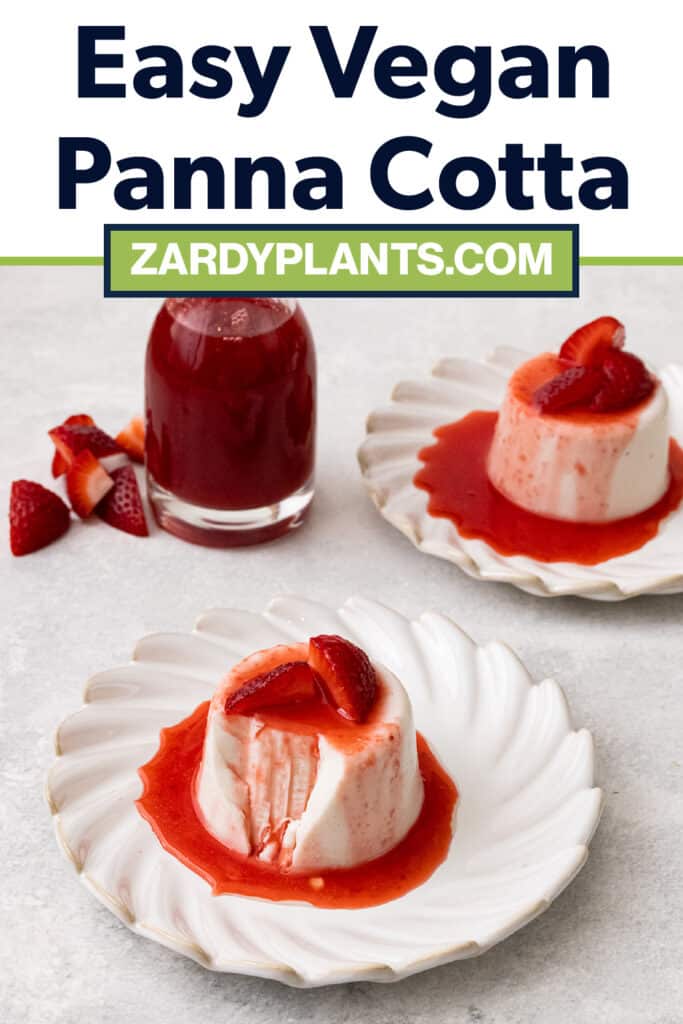
Easy Vegan Panna Cotta is a delicious chilled vegan dessert made with just 4 ingredients! This simple and tasty vegan dessert is has a creamy texture and lovely sweet flavor that's refined sugar-free!

This post may contain affiliate links. See our disclosure policy for details.
Hey Internet, I love easy desserts, and this delicious vegan panna cotta with easy strawberry sauce (like a strawberry coulis) is my new favorite! You just need a few simple ingredients and a small pot to make this really delicious vegan twist on a classic Italian dessert.
This is one of the latest of a spree of Vegan Italian Recipes (internal link) we've been working on, like our Tofu Gnocchi, Tiramisu Chia Pudding, Butter Bean Salad, Creamy Vegan Orzo, and our Vegan Manicotti which is actually an older recipe that we recently rephotographed, mostly because we wanted an excuse to eat it again.
But today we're here to talk about a delicious four-ingredient dessert. I've been playing around with the idea of veganizing a classic panna cotta for a while now... I'm glad I finally got the idea to do it! And with the berry sauce I made out of only 3 ingredients I had on hand (still no refined sugar!), it really has become a very magical dessert and I'm so excited to share it with you.
Italian panna cotta is a moulded pudding that, once chilled, takes the shape of whatever you pour it into. It really only takes about 10-15 minutes to make and then it just chills in the fridge until you're ready to eat it! It actually only takes about an hour to solidify, but we personally like it cold and try to make it at least a few hours in advance of when we'd like to enjoy it.
Traditional panna cotta uses heavy cream and gelatin. Our vegan version uses agar powder (extracted from red algae), a plant-based gelling agent.
We've actually used this thickening agent many times when making Vegan Cheese Recipes such as our Vegan Brie, Vegan Camembert, and our Vegan Cheese Ball.
Anyway, this plant-based panna cotta is yet another delicious treat in a line of Vegan No Bake Desserts we've made and really enjoyed. I love desserts that are served in little glasses or jars too, such as my Chocolate Tofu Mousse and Vegan Chocolate Pudding (both perfect for chocolate lovers) as well as any of my chia pudding recipes such as my Tiramisu Chia Pudding, Lemon Blueberry Chia Pudding, Peach Chia Pudding, Chocolate Peanut Butter Chia Pudding, Apple Pie Chia Pudding, and Pumpkin Chia Pudding.
But let's talk about the magic of this creamy vegan panna cotta.
Why You'll Love This Vegan Panna Cotta Recipe
- 4 Simple Ingredients: You only need 4 ingredients to make this amazing vegan dessert. They're also quite wholesome ingredients as I've only used maple syrup here instead of white sugar.
- Deceptively Easy: You might be nervous if this is your first time working with agar agar powder (aka agar powder, NOT agar agar flakes), but trust me that this luxurious dessert recipe is very beginner-friendly.
- Fancy and Fun: This is an elegant dessert that's the perfect dessert to serve to anyone you want to impress at special occasions like a dinner party, and they look beautiful especially if you want to pop them out of the container like we did! Of course, you can just eat them out of the jar with a spoon too.
Ingredients
Pick up the following ingredients for this tasty coconut panna cotta the next time you're at a grocery store. See the recipe card at the bottom of this post for full ingredients, instructions, and accurate nutrition information (to the best of my ability; please consult your physician, registered dietitian, or healthcare professional if you have specific dietary needs or need to meet certain daily values of any nutrient). I give substitutions for the ingredients in the section below this one, so most people can still make this recipe!
Vegan Panna Cotta Ingredients
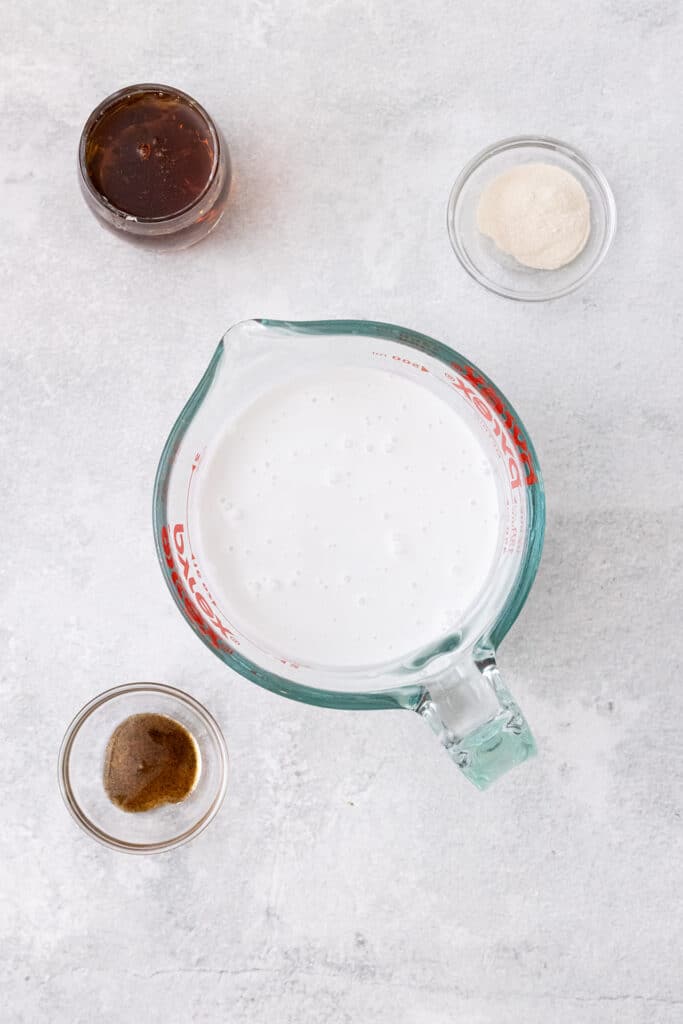
- 13.66 Ounce Can of Room Temperature Full Fat Coconut Milk: This is the main ingredient so we want to be clear here. The brand you buy will influence the quality of the panna cotta, so for best results we recommend the following brands: Thai Kitchen Organic Coconut Milk or Native Forest Organic Coconut Milk. The former (Thai Kitchen) is easier to find, though the Native Forest one is more sustainably sourced. Make sure you get the full fat can of coconut milk for best results and make sure the only ingredient is coconut milk. Canned coconut cream is also acceptable (you may need to add a splash of dairy-free milk to get it to stir nicely with the other ingredients).
- 3 Tablespoons Pure Maple Syrup: Our recipe is refined sugar free so it uses grade A pure maple syrup! You may need more or less to taste, which is why I recommend tasting the panna cotta mixture before adding the agar powder.
- ¼ Teaspoon Vanilla Bean Paste: This is the best flavor vanilla next to using a whole vanilla bean which I haven't yet tried doing! If you have that, go ahead and use the yields of half a whole vanilla pod. If you only have vanilla extract, use a half teaspoon since the paste is more concentrated (vanilla bean paste is absolutely worth it, by the way).
- ½ Teaspoon Agar Powder: This is NOT the same as agar flakes. Agar-agar powder is a more concentrated powder so you only need a half teaspoon. If you only have the flakes, it looks like roughly 3 times the amount of flakes are needed if substituting, but they can also be rougher so you may need to cook them longer. I have not tried this or any recipe with agar flakes so do so with that in mind. Try to use the agar powder if you can instead. I’ve found it online, in health food stores, and sometimes even in chain supermarkets. You only need a small amount, but you’ll be able to make SO MANY BATCHES, plus it can be used for other things like gelatin replacement.
- OPTIONAL Cooking Spray: If you intend to pop your vegan panna cotta out of the mould to serve, I recommend coating the inside with just a little cooking spray (I spritz a little in and use a basting brush (or use clean fingers) to coat the inside walls of the containers. You can also use like ½ to 1 teaspoon vegetable oil or whatever else you have on hand. Anyway, this makes it a lot easier to get it out of the container but it's not necessary if you don't mind eating it out of the dish.
Optional Strawberry Sauce Topping Ingredients
- 2 Heaping Cups Frozen Strawberries (or 2 cups fresh strawberries, washed and sliced): I used frozen berries here to save money, but fresh berries will work fine too (it'll even be a little faster since you won't have to wait for them to thaw in the pan). You're welcome to use mixed berries too, but I personally dislike the seeds in the blackberries and raspberries when made into a sauce... Yes I realize they can be strained out, but I like to use the pulp from straining into my oatmeal, so I find it easier just to use strawberries, plus I love the flavor!
- 6 Tablespoons Pure Maple Syrup: Again, you're welcome to use agave syrup, cane sugar, coconut sugar or even a sugar substitute (I'm coming out with a sugar free strawberry syrup recipe soon!).
- 3 Tablespoons Lemon Juice: Lemon juice or lime juice are both fine here.
Substitutions
- Coconut Milk: I have tested this recipe with soy milk and it did technically work. I think it would also technically work with oat milk, almond milk, or any other plant-based milk. HOWEVER, it was not a very creamy dessert like the coconut panna cotta I made with full fat coconut milk... so please consider that when making substitutions. One thing that may work is a homemade cashew milk that's a higher cashew to water ratio than typical store bought version. You're looking for a very thick consistency like full fat coconut milk or heavy cream. A plant based heavy cream that you buy from a store may also work, but I haven't tested any other options.
- Maple Syrup: Agave syrup, cane sugar, coconut sugar, etc. can all be used in place of the maple syrup (should be about the same amount, and to taste). It should also work fine with powdered sugar replacements like stevia. I stuck with maple syrup to keep it refined sugar free. Keep in mind that if you use a granulated sugar, you'll want to whisk it in while the pot is heating until you're sure the granules have dissolved.
- Vanilla Bean Paste: Vanilla extract and vanilla bean powder are fine replacements for the vanilla bean paste. You can use other extracts for a different flavoring, just be careful and use less than you think (start with ⅛ teaspoon) because non-vanilla extracts can be quite strong and actually make the recipe taste bitter if you use too much. Coconut extract or lemon extract I think would be especially lovely in this recipe.
- Agar Powder: I've heard guar gum can work instead, but I've never tried it so I can't make a recommendation either for or against it.
- Other Ingredients: I tested adding lemon juice to this recipe but it makes the milk separate, so I don't recommend it. If you want a strong lemon flavor, consider making a lemon simple syrup, add a pinch of lemon zest, or you could add more lemon juice to the strawberry syrup that gets poured on top of the panna cotta. You could also substitute lime juice and that would be lovely. I did not find coconut oil to be a worthwhile ingredient in this recipe, but you can try it if you like. You could add cocoa powder (or melt in some chocolate chips) for a chocolate panna cotta if you wish. If you do, I recommend adding a tiny pinch of salt to accentuate the chocolate flavor.
How to Make Vegan Panna Cotta
- Order of Operations: You can make both the vegan panna cotta and the strawberry sauce at the same time (that didn't go well for me, lol, I accidentally added the wrong ingredients into the wrong pot) or you can make them separately. It doesn't really matter which you make first, because they both take a while to chill in the fridge. I'll list the directions for the panna cotta first, and then the strawberry sauce.
- Prep the Panna Cotta: In a small saucepan, whisk together the full-fat coconut milk, maple syrup, and vanilla bean paste. Taste and add more sweetener if needed. Set your burner to medium heat. Now whisk in the agar powder for about one minute. Allow the mixture to come to a simmer, stirring occasionally.
- Cook the Panna Cotta: Once at a strong simmer, set a timer for about 4 minutes and allow to cook, stirring frequently. After about 2-3 minutes, my mixture started threatening to boil over so I had to turn the heat down a bit. Monitor yours in case it does the same.
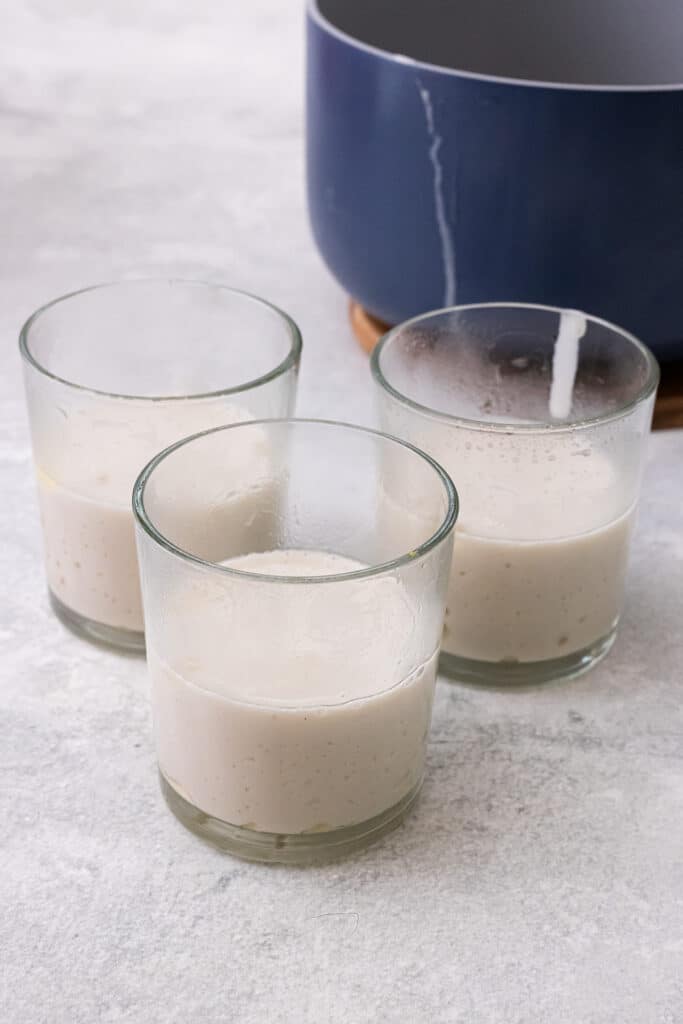
- Prep the Molds: While the panna cotta mixture is cooking, you can spritz the inside of the containers (I used tiny glass cups, but silicone molds, small ramekins, or any airtight container should work, though I've not had luck using plastic containers and molded foods) with a little cooking spray and use a basting brush or clean fingers to coat the insides of each container with a little oil (vegetable oil or whatever else can work fine too, I just had a pure avocado oil spray on hand).
- Pour the Mixture into Container(s): I divided my mixture between 3 containers for a modest dessert for each serving. You can do however many you'd like. Feel free to also double the recipe if you prefer; it will work fine. Refrigerate at least one hour to set. I prefer 4-6 hours for it to get cold.
- Prep the Strawberry Sauce: Add the frozen (or fresh) strawberries, lemon juice, and maple syrup to a small saucepan and heat covered over medium low heat. You'll need to stir every so often. This may take a bit if your strawberries are frozen (mine were), but it will be much faster with fresh strawberries.
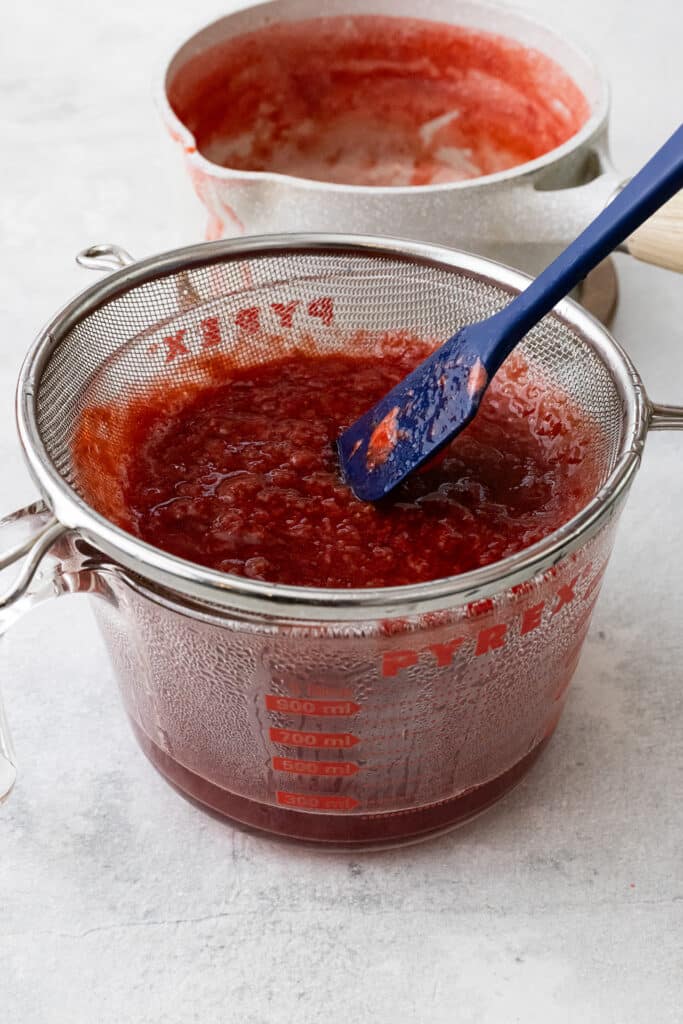
- Cook the Strawberry Sauce: Regardless, when the strawberries are soft, it's time to lightly mash them. I used this potato masher but a fork will work. Be gentle; you only want to mash them a little so they aren't huge chunks AND you don't want to splatter the hot liquid on yourself. Once mashed, cook uncovered for about 15-25 minutes. For me, it took about 20 minutes but it depends on the size of your pot (wider will be faster because of heat distribution, however I prefer a pot that is smaller because it is easier to whisk the liquid, it won't burn as easily, and my small saucepan has a spout which makes it easier to transfer the hot mixture) and the strength of your burner. Either way, you want the amount of liquid to reduce by about half. It won't be super syrupy at this point but it will thicken a bit as it cools. The longer you cook it, the thicker it will be, but it will also reduce the yield of syrup.
- Strain the Strawberry Sauce (OPTIONAL): If you prefer a chunky syrup, you can store it immediately in an airtight container (like a mason jar). If you'd like to strain it, follow these instructions: Place a fine-mesh sieve or fine mesh strainer over a large vessel (I used an 8-cup measuring bowl with a handle; it helps to have a bowl that is a similar size as your strainer) and pour the contents of the pot in. Use your spatula or spoon to stir the pulp around to encourage the syrup to drip out. The strainer will retain the solid pulp. Allow it to drain for a while (at least 10 minutes, up to 20) and stir every so often to encourage more syrup to drip down. Don't attempt to shove the pulp through the strainer because that will make your syrup less smooth. I mean, it's fine if you don't care about that. But I like using the extra syrup in coffee or sparkling water concoctions, so I recommend keeping them separate. I save the pulp in a small glass jar and spoon it over my oatmeal (or yogurt, ice cream, etc.) for the next few days after I make this syrup. Pour the strained liquid syrup into a jar and refrigerate for several hours to chill.
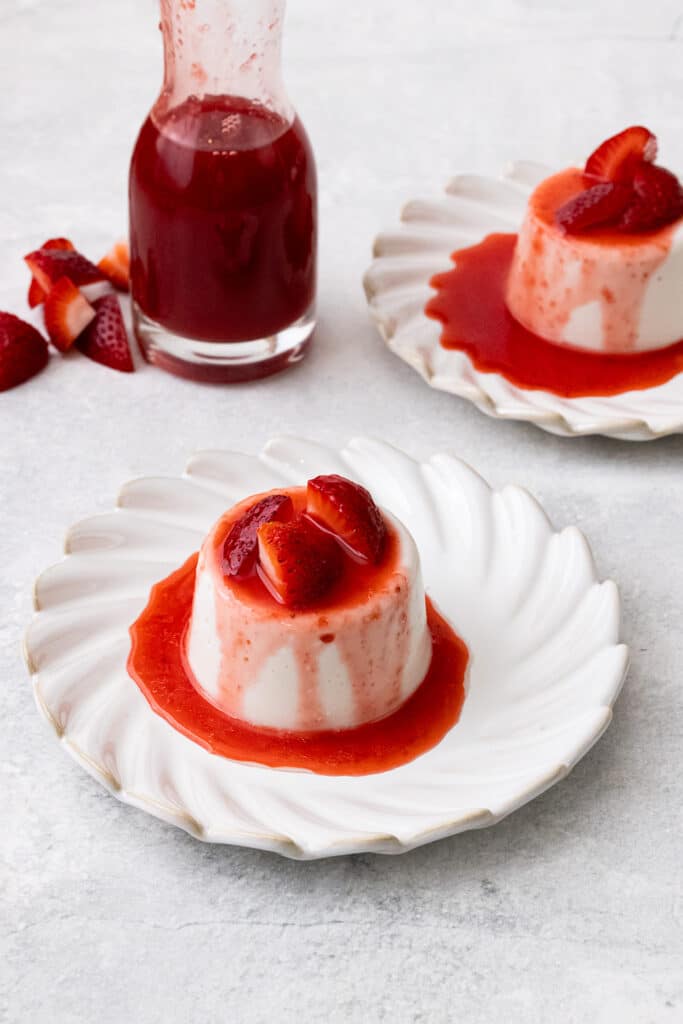
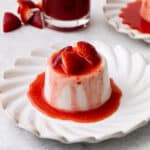
- Serve Vegan Panna Cotta: You can keep these in the containers OR pop them out. To pop them out, run a clean butter knife around the inside wall of the container (taking care not to damage the dessert itself) and then flip the container upside down on a plate. Sometimes holding the cup in the air just above the plate and shaking it, tapping the bottom, or even gently using the butter knife to encourage it to pop onto the plate can help. If you really can't get it out, you can always just eat it out of the jar and it will still be good. Top with a few fresh berries like chopped strawberries, blueberries, raspberries, and even a few mint leaves if you'd like. Pour over some of the strawberry sauce and enjoy!
- Storage Instructions: Refrigerate vegan panna cotta covered in containers as well as the sauce in an airtight container for up to 4 or 5 days.
More No Bake Vegan Desserts
- Chocolate Tofu Mousse
- Vegan Ice Cream Cake
- Cherry Nice Cream
- Chocolate Bliss Balls
- The Best Vegan Chocolate Pudding
- Vegan Chocolate Covered Pretzels
- Avocado Nice Cream
- Chocolate Peanut Butter Tofu Smoothie
- Vegan Puppy Chow
- Even more No-Bake Vegan Dessert Recipes!
Easy Vegan Panna Cotta (4 Ingredients) with Strawberry Sauce
- Total Time: 1 hour, 10 minutes
- Yield: 3 servings
- Diet: Vegan
Description
Easy Vegan Panna Cotta is a delicious chilled vegan dessert made with just 4 ingredients! This simple and tasty vegan dessert is has a creamy texture and lovely sweet flavor that's refined sugar-free!
Ingredients
Vegan Panna Cotta Ingredients
- 13.66 ounce Can Full Fat Coconut Milk (see Note 1 for substitutions)
- 3 Tablespoons Pure Maple Syrup (see Note 2)
- ¼ Teaspoon Vanilla Bean Paste (see Note 3)
- ½ Teaspoon Agar Powder (NOT AGAR FLAKES; see Note 4)
- OPTIONAL Cooking Spray (to help with removing from mold after chilling)
Optional Strawberry Sauce Topping Ingredients
- 2 Heaping cups Frozen Strawberries (or 2 cups fresh strawberries, washed and sliced)
- 6 Tablespoons Pure Maple Syrup
- 3 Tablespoons Lemon Juice
Instructions
- Order of Operations: You can make both the vegan panna cotta and the strawberry sauce at the same time (that didn't go well for me, lol, I accidentally added the wrong ingredients into the wrong pot) or you can make them separately. It doesn't really matter which you make first, because they both take a while to chill in the fridge. I'll list the directions for the panna cotta first, and then the strawberry sauce.
- Prep the Panna Cotta: In a small saucepan, whisk together the full-fat coconut milk, maple syrup, and vanilla bean paste. Taste and add more sweetener if needed. Set your burner to medium heat. Now whisk in the agar powder for about one minute. Allow the mixture to come to a simmer, stirring occasionally.
- Cook the Panna Cotta: Once at a strong simmer, set a timer for about 4 minutes and allow to cook, stirring frequently. After about 2-3 minutes, my mixture started threatening to boil over so I had to turn the heat down a bit. Monitor yours in case it does the same.
- Prep the Molds: While the panna cotta mixture is cooking, you can spritz the inside of the containers (I used tiny glass cups, but silicone molds, small ramekins, or any airtight container should work, though I've not had luck using plastic containers and molded foods) with a little cooking spray and use a basting brush or clean fingers to coat the insides of each container with a little oil (vegetable oil or whatever else can work fine too, I just had a pure avocado oil spray on hand).
- Pour the Mixture into Container(s): I divided my mixture between 3 containers for a modest dessert for each serving. You can do however many you'd like. Feel free to also double the recipe if you prefer; it will work fine. Refrigerate at least one hour to set. I prefer 4-6 hours for it to get cold.
- Prep the Strawberry Sauce: Add the frozen (or fresh) strawberries, lemon juice, and maple syrup to a small saucepan and heat covered over medium low heat. You'll need to stir every so often. This may take a bit if your strawberries are frozen (mine were), but it will be much faster with fresh strawberries.
- Cook the Strawberry Sauce: Regardless, when the strawberries are soft, it's time to lightly mash them. I used this potato masher but a fork will work. Be gentle; you only want to mash them a little so they aren't huge chunks AND you don't want to splatter the hot liquid on yourself. Once mashed, cook uncovered for about 15-25 minutes. For me, it took about 20 minutes but it depends on the size of your pot (wider will be faster because of heat distribution, however I prefer a pot that is smaller because it is easier to whisk the liquid, it won't burn as easily, and my small saucepan has a spout which makes it easier to transfer the hot mixture) and the strength of your burner. Either way, you want the amount of liquid to reduce by about half. It won't be super syrupy at this point but it will thicken a bit as it cools. The longer you cook it, the thicker it will be, but it will also reduce the yield of syrup.
- Strain the Strawberry Sauce (OPTIONAL): If you prefer a chunky syrup, you can store it immediately in an airtight container (like a mason jar). If you'd like to strain it, follow these instructions: Place a fine-mesh sieve or fine mesh strainer over a large vessel (I used an 8-cup measuring bowl with a handle; it helps to have a bowl that is a similar size as your strainer) and pour the contents of the pot in. Use your spatula or spoon to stir the pulp around to encourage the syrup to drip out. The strainer will retain the solid pulp. Allow it to drain for a while (at least 10 minutes, up to 20) and stir every so often to encourage more syrup to drip down. Don't attempt to shove the pulp through the strainer because that will make your syrup less smooth. I mean, it's fine if you don't care about that. But I like using the extra syrup in coffee or sparkling water concoctions, so I recommend keeping them separate. I save the pulp in a small glass jar and spoon it over my oatmeal (or yogurt, ice cream, etc.) for the next few days after I make this syrup. Pour the strained liquid syrup into a jar and refrigerate for several hours to chill.
- Serve Vegan Panna Cotta: You can keep these in the containers OR pop them out. To pop them out, run a clean butter knife around the inside wall of the container (taking care not to damage the dessert itself) and then flip the container upside down on a plate. Sometimes holding the cup in the air just above the plate and shaking it, tapping the bottom, or even gently using the butter knife to encourage it to pop onto the plate can help. If you really can't get it out, you can always just eat it out of the jar and it will still be good. Top with a few fresh berries like chopped strawberries, blueberries, raspberries, and even a few mint leaves if you'd like. Pour over some of the strawberry sauce and enjoy!
- Storage Instructions: Refrigerate vegan panna cotta covered in containers as well as the sauce in an airtight container for up to 4 or 5 days.
Notes
- Note 1: This is the main ingredient so we want to be clear here. The brand you buy will influence the quality of the panna cotta, so for best results we recommend the following brands: Thai Kitchen Organic Coconut Milk or Native Forest Organic Coconut Milk. The former (Thai Kitchen) is easier to find, though the Native Forest one is more sustainably sourced. Make sure you get the full fat can of coconut milk for best results and make sure the only ingredient is coconut milk. Canned coconut cream is also acceptable (you may need to add a splash of dairy-free milk to get it to stir nicely with the other ingredients).
- Note 2: Our recipe is refined sugar free so it uses grade A pure maple syrup! If you think you want it less sweet, you can use less. You may need more or less to taste, which is why I recommend tasting the panna cotta mixture before adding the agar powder. Agave syrup, cane sugar, coconut sugar, etc. can all be used in place of the maple syrup (should be about the same amount, and to taste). It should also work fine with powdered sugar replacements like stevia. Keep in mind that if you use a granulated sugar, you'll want to whisk it in while the pot is heating until you're sure the granules have dissolved.
- Note 3: This is the best flavor vanilla next to using a whole vanilla bean which I haven't yet tried doing! If you have that, go ahead and use the yields of half a whole vanilla bean pod. If you only have vanilla extract, use a half teaspoon since the paste is more concentrated (vanilla bean paste is absolutely worth it, by the way).
- Note 4: This is NOT the same as agar flakes. Agar-agar powder is a more concentrated powder so you only need a half teaspoon. If you only have the flakes, it looks like roughly 3 times the amount of flakes are needed if substituting, but they can also be rougher so you may need to cook them longer. I have not tried this or any recipe with agar flakes so do so with that in mind. Try to use the agar powder if you can instead. I’ve found it online, in health food stores, and sometimes even in chain supermarkets. You only need a small amount, but you’ll be able to make SO MANY BATCHES, plus it can be used for other things like gelatin replacement.
- Prep Time: 10 minutes
- Cook Time: 1 hour
- Category: Dessert, Snack
- Method: Stove Top
- Cuisine: American, Italian
Leave a Reply