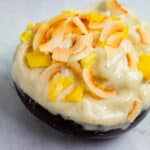
Easy, creamy, vegan coconut nice cream (ice cream made from bananas!) doesn't actually taste like banana but rich, creamy coconut and a texture that rivals traditional soft serve ice cream. This 5-minute dessert is dairy free to please your gut, has no added sugar, and is topped with delicious toasted coconut and mango for a tropical experience in your own home.

This post may contain affiliate links. See our disclosure policy for details.
Hey Internet, are you interested in a 5 minute dessert? I am normally a savory person, but ice cream has always been one of my favorite foods and definitely my favorite dessert.
I absolutely love the flavor of toasted coconut, so when I found a nondairy milk that was flavored with it, I fell in love! This post isn't sponsored by Califia Farms -- I just really love their product!
If you cannot find this ultra creamy nondairy milk at your grocery store, use any other kind of coconut milk (even canned, but you'll need some liquid so maybe choose the "light" version).
It's really simple and fun to make, so let's just get into it!

What You'll Need
There's only 2 ingredients in this nice cream: frozen bananas and coconut milk!
As I mentioned above I seriously recommend the Toasted Coconut flavored nondairy milk from Califia Farms if you can find it, but if you can't you can use any other coconut milk (refrigerated or canned).
If using canned, I recommend "light" or "lite" coconut milk for the liquid (which enables the bananas to become creamy nice cream!).
Can't find any coconut milk? That's OK. Use any other type of nondairy milk and either add about ¼ - ½ teaspoon coconut extract or some shredded coconut right into the mix.
Optional toppings included toasted coconut flakes / shreds (scroll down for instructions), chopped mango (I defrosted a handful of frozen chunks), nuts, chocolate chips, even chocolate sauce or caramel sauce.
How to Freeze Bananas
I highly recommend having bananas in your freezer at all times, but if you've never frozen bananas before, here's a couple of tips:
I like to freeze my peeled spotty (ripe) bananas in a single layer on a parchment lined baking tray. When frozen, I add them to a large freezer safe container of banana pieces for nice creams, smoothies, etc.
Frozen bananas stay good for a few months if in a proper container, though they might darken a little bit from oxidization. That doesn't happen to us much though since we go through so many of them!

How to Make Coconut Nice Cream
Making this nice cream is so easy! All you need is a food processor or a blender.
First add the bananas, then add the coconut milk on top. If you're using other nondairy milk and coconut extract or shreds, add those now too.
How much coconut / nondairy milk you'll need depends on both how many bananas you have and how powerful your blender or food processor is. If you don't have a high powered blender or food processor, you may need to add more liquid, but only add it a little at a time.
If you're having trouble getting the mixture to blend, here's a few ideas to get it moving: chop your bananas into smaller pieces, add a little bit more liquid, stop and scrape down the sides or stir the mixture (use your tamper if you have a Vitamix), or even try letting the bananas defrost a little, blend, and then stick it back in the freezer for 10-15 minutes.
Finally, pile it high in a bowl (I love coconut bowls for this!), top it with desired toppings (I used toasted coconut and mango), and enjoy!
How to Toast Coconut
Toasting coconut is easy and quick, but you have to be very careful as it can burn quickly! Depending on whether you're using coconut flakes or coconut shreds, your cook time will change.
By the way, you can use sweetened or unsweetened coconut as is your preference. I prefer unsweetened coconut.
Set your oven to 350 degrees Fahrenheit (177 degrees Celsius) and spread out your coconut in a single layer on a silicone mat (or parchment) lined baking tray. I always recommend silicone mats because they're cheaper, they're less wasteful, and they encourage the browning process!
I toasted my coconut on the top rack of my oven for about 5 minutes, stirring / checking halfway through. It is imperative to check often -- I usually turn the oven light on so I can check it often since I've burned it probably about a million times since I'm easily distracted.
That's it! Store your toasted coconut in an airtight container (like a mason jar) at room temperature (I recommend a cool, dark place like a cupboard) for up to 2 weeks.
Serving It Up A La Mode
Since this nice cream is lower in calorie and sugar than most, you could also try adding a scoop of it to any dessert, though I'd recommend one of the following (not that I'm biased):
Soft Baked Chocolate Chip Cookies
Gluten-Free Chocolate Pecan Pie
or, and I'm being a little bad here:
Salted Caramel Tahini Brownies (coming soon!)
Anything else?
As always, I hope you love this recipe--I know I do because ice cream is one of my faves! This coconut nice cream is super duper creamy and delicious. For those of you who aren't crazy about bananas, it really doesn't taste like them, the coconut is dominant.
Let me know in the comments below if you make this recipe or tag me @Zardyplants on Instagram so I can see your beautiful recreations! If you tag me on IG, I will share your post in my stories :)
Also, one quick request: if you love how this recipe looks or tastes, please leave me a 5-star rating and a nice comment–ratings help more people find my recipes which helps me keep providing them! Thank you!
<3 Liz

Follow me on Social Media!

Vegan Coconut Nice Cream
- Total Time: 5 minutes
- Yield: 2 cups 1x
- Diet: Vegan
Description
Easy, creamy, vegan coconut nice cream (ice cream made from bananas!) doesn't actually taste like banana but rich, creamy coconut soft serve!
Ingredients
- 2 cups frozen bananas (about 4 large bananas-ish)
- ¼ cup coconut milk (or a bit more, as needed) (see note 1)
- Toasted coconut and chopped mango for topping, optional
Instructions
- First add the bananas, then add the coconut milk on top. If you're using other nondairy milk and coconut extract or shreds, add those now too.
- How much coconut / nondairy milk you'll need depends on both how many bananas you have and how powerful your blender or food processor is. If you don't have a high powered blender or food processor, you may need to add more liquid, but only add it a little at a time.
- If you're having trouble getting the mixture to blend, here's a few ideas to get it moving: chop your bananas into smaller pieces, add a little bit more liquid, stop and scrape down the sides or stir the mixture (use your tamper if you have a Vitamix), or even try letting the bananas defrost a little, blend, and then stick it back in the freezer for 10-15 minutes.
- Finally, pile it high in a bowl, top it with desired toppings (I used toasted coconut and mango), and enjoy!
- Freeze leftovers in an airtight container up to one week, but the texture does become slightly less creamy.
Notes
- Note 1: As I mentioned above I seriously recommend the Toasted Coconut flavored nondairy milk from Califia Farms if you can find it, but if you can't you can use any other coconut milk (refrigerated or canned). If using canned, I recommend "light" or "lite" coconut milk for the liquid (which enables the bananas to become creamy nice cream!). Can't find any coconut milk? That's OK. Use any other type of nondairy milk and either add about ¼ - ½ teaspoon coconut extract or some shredded coconut right into the mix.
- Cook Time: 5 minutes
- Category: Dessert
- Method: Freezer
- Cuisine: American
Keywords: Vegan, Oil-Free, Gluten-Free, Nut-Free, Sugar-Free, Soy-Free, Nice Cream, Ice Cream, Frozen Bananas


Leave a Reply