This delicious Honey Garlic Tofu is a super easy and flavorful dish. Serve it with rice and your favorite vegetable for a fantastic and satisfying meal.

This post may contain affiliate links. See our disclosure policy for details.
Hey Internet, I love a good tofu dish. In fact, I have a ton of tofu recipes because I just can’t get enough.
Honey Garlic Tofu is such a great flavor combination. It’s sweet, it’s salty, it’s garlicky, and you can make it spicy easily too. The tofu is cooked until it’s crispy and then added to this addictive sauce… so good! And yes, it’s vegan--no bees were involved. :)
This dish is similar to my sticky tofu, and utilizes my favorite way to make crispy tofu. If you like this dish, I know you’ll also like my vegan orange chicken (tofu), vegan beef and broccoli (also tofu), sweet and sour tofu, and kung pao tofu.
I love serving this vegan honey garlic tofu over jasmine rice with baby broccoli, though any veggie (even stir fried veggies) would be perfect.
Why This Recipe Works
When you cook down a sauce with any type of sugar in it, it gets super sticky, and that’s what happens to the “honey” (we used agave) in this recipe. Technically any sugar will work.
There’s a massive amount of garlic in my version of this recipe, but of course you’re welcome to dial it back if you’re not a garlic freak like my husband and I are. Hopefully we don’t perpetually smell like garlic to others… BTW a quick trick for getting the garlic smell out of your hands is to make a slurry from water and baking soda, rub it on your hands, and wash it off!
The tofu in this recipe is cooked separately until the sauce is ready, so it retains all of its chewy and crispy texture. And then once it’s coated in the sauce, it gets served immediately and I promise it’s completely delicious.
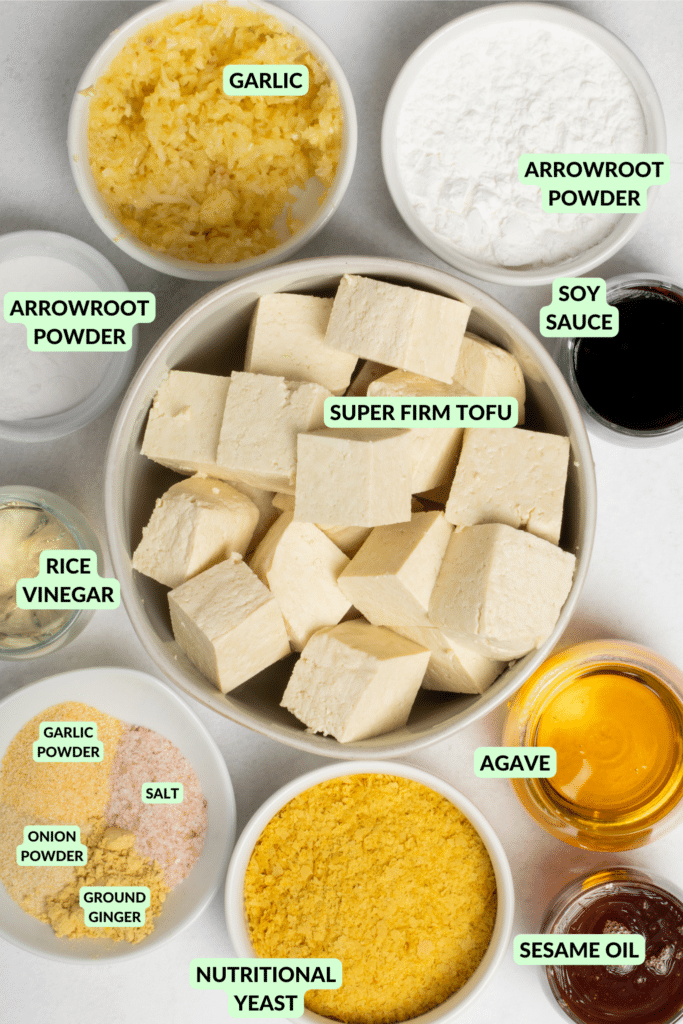
Ingredients and Notes
For the tofu:
- Super firm tofu: For this recipe, we want to use the tofu in vacuum-sealed plastic, not a tub of water. If you only have firm or extra firm tofu (that comes in water), you can still make my honey garlic tofu. You’ll want to drain the tub of tofu and press the block of tofu, using either a tofu press or two plates or cutting boards, paper towels, and a heavy weight (like books or a cast iron pan) for 20-30 minutes. Otherwise it may turn out soggy. The other option you have is taking soft tofu, tossing pieces of it in cornstarch, and pan frying it in a neutral high heat oil. Because of how much faster and easier it is, I recommend the super firm tofu if you can find it--I can usually find it in my local supermarket, Trader Joe’s, Asian market, and even Costco. You could also just substitute soy curls, seitan chunks, or store-bought vegan chicken pieces--breaded or not.
- Reduced sodium soy sauce: This is optional. I like to coat my super firm tofu in a mixture of soy sauce and a little oil (only sometimes do I use the oil) before adding it do the dry mix. You can use regular soy sauce if you prefer, I just find it too salty for my tastes. Use gluten-free tamari if you can’t have gluten.
- Oil: So this is optional, BUT it will give you super crispy tofu. You absolutely can obtain crispy tofu without the oil, and when I’m just cooking it for myself (not for a recipe), I usually skip this step and throw the cubed tofu straight in a reusable food stage bag with the dry ingredients.
- Nutritional yeast: I know it sounds strange but it’s super savory and delicious here--and no, it does not make the tofu taste cheesy. But if you hate the stuff, replace it with plain old breadcrumbs (use gluten-free if needed).
- Arrowroot powder or cornstarch: This does two things for the tofu--it helps soak up any extra moisture and it also helps create a “skin” that will get crispy while cooking.
- Spices: I like to use granulated onion, granulated garlic, ground ginger, and sea salt. You can add pepper, chili powder, anything you like. If watching sodium, leave out the salt.
For the sauce:
- Minced fresh garlic: I really love the flavor of fresh garlic in this sauce and I used a lot. You can use less or use garlic powder if you need to, but I highly recommend fresh (they do have a different flavor).
- Agave or vegan honey: I’m not going to get into the argument of honey being ethical. It’s not vegan, so we aren’t using it. The easiest substitute is to just use agave (I use light agave), but you could also use my homemade vegan honey if you’re missing that flavor. I LOVE that stuff and it really works in this recipe, but so does agave or maple syrup (maple adds a bit of a different flavor, just FYI) so use whatever you’d like. If you’re a person who chooses to eat honey, that will also work here.
- Toasted sesame oil: This is also optional. It adds to the flavor, but this is perfectly good without it if you’re avoiding oil.
- Reduced sodium soy sauce: Again, you can use regular soy sauce if you prefer, I just find it too salty for my tastebuds. Use gluten-free tamari if you can’t have gluten. You could also use coconut aminos if you’d like.
- Rice vinegar: This adds a little tang which helps balance the sweetness of the sauce. You can substitute any vinegar you like or use fresh squeezed citrus (although be aware that heating citrus causes it to lose flavor, so you can just add it at the end if you like.
- Arrowroot powder: Since we don’t want to cook this down for a really long time, a thickening agent like arrowroot powder helps it thicken into a silky and delicious sauce. If you mix this with a bit of water, you can get a slurry and add it into the sauce once simmering (requires heat to activate). Cornstarch will also work, though in my experience, arrowroot is a bit better tasting and makes a silkier sauce.



Step by Step Instructions for Honey Garlic Tofu
- NOTE: If you did not buy super firm tofu (the kind that comes vacuum sealed), drain out all the water and press the block of tofu in either a tofu press or between two plates/cutting boards with a heavy weight on them for 20-30 minutes. Waterlogged tofu will not get very crispy.
- Start by making your crispy tofu. Cube your super firm or pressed tofu in 1 inch cubes. In a large wide bowl, add your tofu and pour the oil (if using) and soy sauce over it. Mix gently with a spatula. In a gallon size reusable food storage bag (or another large bowl or container), mix together the nutritional yeast, arrowroot powder or cornstarch, and spices. I use the bag because I can just close it up and shake it. Add the tofu to the bag (shake off excess liquid as you do), seal the top, and shake it very well to coat the tofu completely. If using a bowl, gently toss the tofu in the breading until completely coated.
- Air Fryer Method: Add breaded tofu cubes to your air fryer in a single layer. Set it at 400 degrees Fahrenheit (or 205 degrees Celsius) for 20 minutes and shake the basket halfway through. Check the crispness. If you desire the tofu to be more crispy, cook for longer or you can give it a misting of avocado (or other) oil if you like and then cook it for a few more minutes. 20-22 minutes usually works perfectly for me.
- Oven Method: Preheat your oven to 425 degrees Fahrenheit (218 degrees Celsius) while you prep your tofu. Place breaded tofu cubes on a baking tray lined either with a silicone baking mat (I find this gets the tofu crisper) or parchment paper. Bake for 25-30 minutes, flipping the tofu and rotating the pan halfway through.
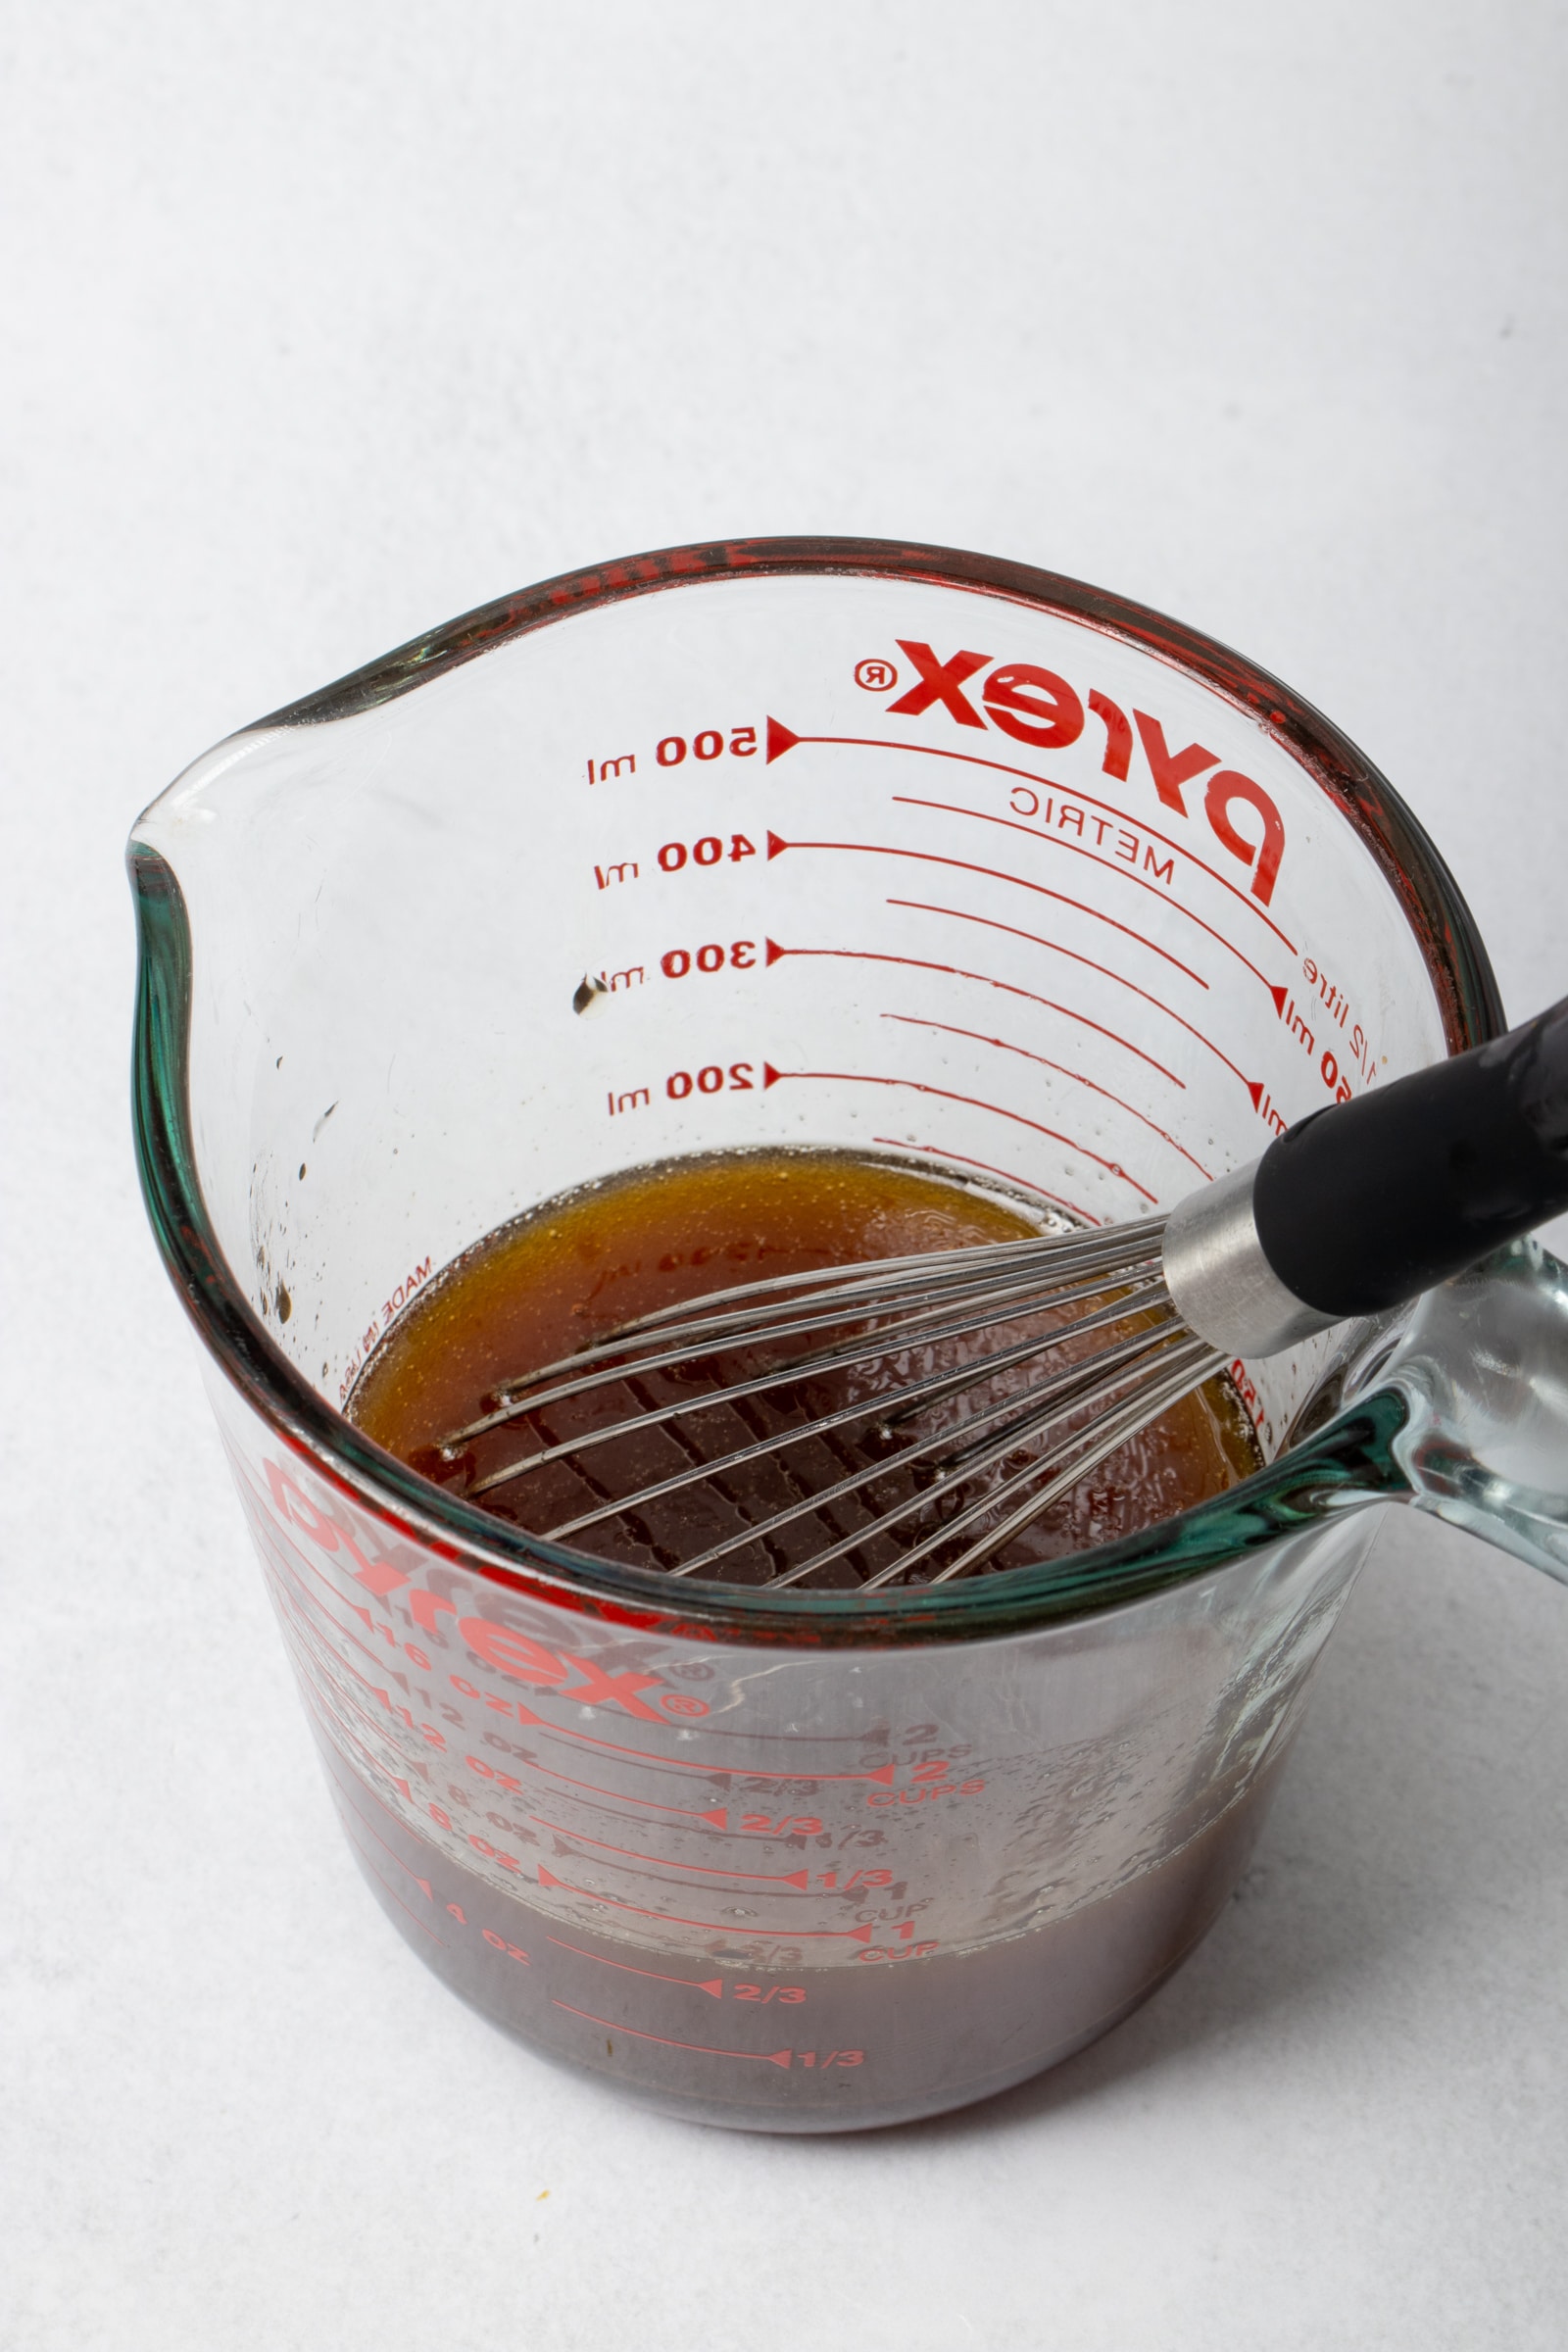
- Mix together the agave or vegan honey, toasted sesame oil (if using), soy sauce, and rice vinegar in a small bowl, jar, or measuring cup. I like the measuring cup because it has a spout.
- When the tofu is nearly done, start the sauce. Add a little oil (if you wish; it’s not necessary if you’re used to cooking garlic without oil) to a large nonstick skillet and heat over medium high heat. Add the garlic and saute for 30 seconds (stirring frequently) and then slowly pour in the mixed sauce. Stir well and bring to a simmer. Turn the heat down to medium and let the sauce simmer for about 2 minutes.
- Mix together the 1 tablespoon of arrowroot powder and ¼ cup of water in a small bowl or measuring cup. Pour into the pan and stir constantly until the sauce is thickened (it should happen almost immediately, within a minute). Add the tofu and toss until coated.
- Serve immediately with whatever you like--we served our honey garlic tofu over jasmine rice with broccolini / baby broccoli. Garnish with sesame seeds and green onion. Add chili flakes if desired. Enjoy!
- Refrigerate leftover tofu in an airtight container for up to 3 days. I recommend reheating in a pan for better texture (than a microwave).
Frequently Asked Questions
The absolute best tofu for this recipe is super firm tofu. Look for the tofu that comes vacuum sealed in plastic as opposed to the tofu that comes in a plastic tub filled with water. If you can only find “firm” or “extra firm” tofu that comes in water, you’ll want to drain the excess water and press the tofu block using a tofu press or two plates or cutting boards, paper towels, and a heavy weight (like books or a cast iron pan) for 20-30 minutes. Otherwise it may turn out soggy.
Yes, you can use almost any other plant based protein in this recipe, with the note that they may need to be prepared differently. For example, if using store-bought or pre-made seitan chunks, you can just reheat them in a skillet and brown them a little, then they will be perfect to add into the sauce at the end of cooking just like I do the tofu. The same goes for any store-bought chicken or beef alternative (like Gardein), but just prepare it according to package instructions and then add it to the vegan honey garlic sauce. If you’d like to use soy curls, I recommend rehydrating them in flavorful broth, squeezing the excess marinade off, and then dry frying in a skillet, adding a touch of oil only when they start to brown. I’m actually writing a book on soy curls, but in the meantime, learn more about how I use them in this list of soy curls recipes + tips and tricks.
It can be tricky to manage cooking multiple things at once, especially when they cook at different temperatures and/or for different lengths of time. I recommend doing it this way: After you get the tofu in the air fryer or oven, start the rice (this is provided you’re using white rice which cooks faster. If using brown rice, you may want to start it 10-15 minutes before starting the tofu.). Don’t start the baby broccoli until right before you start to saute the garlic for the sauce (step 6). I steamed my baby broccoli, but I think it would take about the same time on a skillet. Alternatively, you could roast your vegetables starting when you start the tofu. Keep in mind that some vegetables (like carrots and potatoes) take a lot longer to cook, so if you cut them small (around ½” thick or less) they’ll cook faster.
What to Serve with this Tofu?
One of my favorite ways to prepare a meal is to think about components. Especially when we’re talking about tofu.
Tofu, in my opinion, is best served with a starch and a vegetable (or multiple vegetables!).
My favorite starch to serve with tofu is rice, and I usually like to use jasmine rice when I make Asian-inspired dishes, or dishes like this one that aren’t really Asian, but do use flavors and ingredients commonly found in Asian dishes, like soy sauce and toasted sesame oil.
Other good starches to serve with tofu include:
- Brown rice
- Black rice
- Quinoa
- Vegan roasted potatoes
- Roasted sweet potatoes
- Even pasta, if that’s what you want!
Any vegetable would go well with this delicious honey garlic tofu, but I think the following vegetables would pair exceptionally well with this dish:
- Bok choy or baby bok choy
- Baby broccoli or broccolini (which I used in this recipe)
- Regular broccoli
- Mushrooms (especially shiitake or maitake), sauteed and browned in a skillet
- Brussels sprouts
- A blend of summer squash like zucchini and yellow squash
- Green beans
- Sauteed or massaged kale
How Long Does This Recipe Keep?
The cooked and coated tofu will last about 3 days in an airtight container. I think it’s best the first day, and still great the second day. The third day the leftovers still tasted great but the texture was not quite as good. Still a good meal, so that’s why I say 3 days.
I recommend reheating the tofu in a pan to try and get some texture back. But if you’re reheating it at work and only have a microwave, it’s still pretty good.
Expert Tips
- Don’t substitute flour for the arrowroot powder. Flour can get wet and messy. Substitute cornstarch or potato starch instead if you can’t find arrowroot powder. I usually find my arrowroot in the baking section of most grocery stores.
- To make sure your breading sticks and your tofu gets crispy, make sure you’re buying the super firm, vacuum sealed tofu. Give it a quick dry on a paper or kitchen towel, then dip it in soy sauce and/or a neutral high heat oil. Shake off the excess liquid before adding it to the dry breading mix.
- After air frying or baking your tofu, let it sit for 5 minutes on the counter before adding it to the sauce--this also helps with the crispy factor.
- Make sure the sauce is good and hot before adding your arrowroot powder slurry, that way the starch will thicken immediately when adding it to the simmering sauce. Add the tofu quickly after that.
- If your sauce gets too thick, add a splash of water and stir well to loosen it up. Then remove from heat and serve as soon as possible.
More Tofu Recipes Like This
If you’re looking for more things to make with tofu, I have a whole post dedicated to all my tofu recipes but here are my faves:
- Sticky Tofu
- Sweet and Sour Tofu
- Tofu Adobo
- Vegan Orange Chicken
- Puffed Tofu
- Vegan Beef and Broccoli
- Vegan Paella
- Crispy Tofu
Never miss a recipe! Join my mailing list to receive a free copy of my e-book on my go-to plant based recipes as well as vegan tips, NEW recipes straight to your inbox. I promise to NEVER spam you or sell your information.
Follow me on Instagram, Facebook, TikTok, Pinterest, or YouTube for more vegan tips, recipes, and to see all my recipe videos (I even have recipes not on the blog!).
Finally, did you know I have books? Visit my shop page to see the various e-books (even a print book!) I have available. My best seller is Plant-Based Jewish Recipes, and I’m in the middle of a second volume of that as well as a new book in the works that focuses on one of my favorite gluten-free vegan proteins.
<3 Liz
Save this for later on Pinterest!


Honey Garlic Tofu (Vegan)
- Total Time: 30 minutes
- Yield: 4 servings 1x
- Diet: Vegan
Description
This delicious Honey Garlic Tofu is a super easy and flavorful dish. Serve it with rice and your favorite vegetable for a fantastic meal.
Ingredients
Tofu
- 16-ounce (454 grams) block of super firm tofu (vacuum sealed, see note 1 for other)
- 2 tablespoons reduced sodium soy sauce, optional (use gluten-free tamari if needed)
- 2 tablespoons avocado oil (or other high heat oil), optional (see note 2 for oil-free)
- ¼ cup nutritional yeast (or substitute breadcrumbs)
- ¼ cup arrowroot powder or cornstarch (see note 3)
- 1 teaspoon garlic powder
- 1 teaspoon onion powder
- ¾ teaspoon ground ginger, optional
- ¾ teaspoon sea salt
Honey Garlic Sauce
- 6-8 cloves garlic, minced, more or less to taste
- 4-5 tablespoons agave or vegan honey, to taste
- ¼ cup reduced sodium soy sauce
- 3 tablespoons toasted sesame oil, optional
- 2 tablespoons rice vinegar
- 1 tablespoon arrowroot powder or cornstarch + ¼ cup water
Instructions
- NOTE: If you did not buy super firm tofu (the kind that comes vacuum sealed), drain out all the water and press the block of tofu in either a tofu press or between two plates/cutting boards with a heavy weight on them for 20-30 minutes. Waterlogged tofu will not get very crispy.
- Make tofu: Cube your super firm or pressed tofu in 1 inch cubes. In a large wide bowl, add your tofu and pour the oil (if using) and soy sauce over it. Mix gently with a spatula. In a gallon size reusable food storage bag (or another large bowl or container), mix together the nutritional yeast, arrowroot powder or cornstarch, and spices. I use the bag because I can just close it up and shake it. Add the tofu to the bag (shake off excess liquid as you do), seal the top, and shake it very well to coat the tofu completely. If using a bowl, gently toss the tofu in the breading until completely coated.
- Air Fryer Method: Add breaded tofu cubes to your air fryer in a single layer. Set it at 400 degrees Fahrenheit (or 205 degrees Celsius) for 20 minutes and shake the basket halfway through. Check the crispness. If you desire the tofu to be more crispy, cook for longer or you can give it a misting of avocado (or other) oil if you like and then cook it for a few more minutes. 20-22 minutes usually works perfectly for me.
- Oven Method: Preheat your oven to 425 degrees Fahrenheit (218 degrees Celsius) while you prep your tofu. Place breaded tofu cubes on a baking tray lined either with a silicone baking mat (I find this gets the tofu crisper) or parchment paper. Bake for 25-30 minutes, flipping the tofu and rotating the pan halfway through.
- Make sauce: Mix together the agave or vegan honey, toasted sesame oil (if using), soy sauce, and rice vinegar in a small bowl, jar, or measuring cup. I like the measuring cup because it has a spout.
- Saute garlic, add sauce: When the tofu is nearly done, start the sauce. Add a little oil (if you wish; it’s not necessary if you’re used to cooking garlic without oil) to a large nonstick skillet and heat over medium high heat. Add the garlic and saute for 30 seconds (stirring frequently) and then slowly pour in the mixed sauce. Stir well and bring to a simmer. Turn the heat down to medium and let the sauce simmer for about 2 minutes.
- Thicken sauce: Mix together the 1 tablespoon of arrowroot powder and ¼ cup of water in a small bowl or measuring cup. Pour into the pan and stir constantly until the sauce is thickened (it should happen almost immediately, within a minute). Add the tofu and toss until coated.
- Serve: Serve immediately with whatever you like--we served our honey garlic tofu over jasmine rice with broccolini / baby broccoli. Garnish with sesame seeds and green onion. Add chili flakes if desired. Enjoy!
- Store: Refrigerate leftover tofu in an airtight container for up to 3 days. I recommend reheating in a pan for better texture (than a microwave).
Notes
- Note 1: For this recipe, we want to use the tofu in vacuum-sealed plastic, not a tub of water. If you only have firm or extra firm tofu (that comes in water), you can still make my honey garlic tofu. You’ll want to drain the tub of tofu and press the block of tofu, using either a tofu press or two plates or cutting boards, paper towels, and a heavy weight (like books or a cast iron pan) for 20-30 minutes. Otherwise it may turn out soggy. The other option you have is taking soft tofu, tossing pieces of it in cornstarch, and pan frying it in a neutral high heat oil. Because of how much faster and easier it is, I recommend the super firm tofu if you can find it--I can usually find it in my local supermarket, Trader Joe’s, Asian market, and even Costco. You could also just substitute soy curls, seitan chunks, or store-bought vegan chicken pieces--breaded or not.
- Note 2: Oil is optional, BUT it will give you super crispy tofu. You absolutely can obtain crispy tofu without the oil, and when I’m just cooking it for myself (not for a recipe), I usually skip this step and throw the cubed tofu straight in a reusable food stage bag with the dry ingredients.
- Note 3: Don’t substitute flour for the arrowroot powder. Flour can get wet and messy. Substitute cornstarch or potato starch instead if you can’t find arrowroot powder. I usually find my arrowroot in the baking section of most grocery stores.
- Note 4: To make sure your breading sticks and your tofu gets crispy, make sure you’re buying the super firm, vacuum sealed tofu. Give it a quick dry on a paper or kitchen towel, then dip it in soy sauce and/or a neutral high heat oil. Shake off the excess liquid before adding it to the dry breading mix.
- Prep Time: 5 minutes
- Cook Time: 25 minutes
- Category: Entree
- Method: Stove top
- Cuisine: Asian, Tofu
Keywords: Vegan recipe, tofu, dinner, vegan honey tofu


Nancy
Made this for the first time last week and we have already had it two times since! So tasty. The nutritional yeast adds so much to the crunch
★★★★★