Easy, flavorful, and inexpensive, this Quick Vegan Pizza Dough will become your go-to for easy homemade pizza no matter what night of the week it is. With this quick-to-make versatile dough, you can make pizza or any number of other savory dishes.

This post may contain affiliate links. See our disclosure policy for details.
Hey Internet, so… I already have a vegan pizza dough recipe, but it is for a voluptuous, thick, doughy pizza that does take a little bit of rise time. It’s delicious, but… I don’t always have that much time on my hands.
I do, however, have a pizza-obsessed husband on my hands. In fact, when we decided to go vegan 3 ½ years ago, his number one question was “can I still have pizza all the time?”
The answer is yes and he does, if you’re wondering.
So I was wondering if I could make a recipe for a pizza dough using quick yeast and requiring little to no kneading, but still with a great texture and flavor.
After a few tests and lots of delicious pizza experimentation later, I was able to produce a quick vegan pizza dough worthy of Saturday Night Pizza Night, though it’s quick enough to make on Tuesday night, too. (Let’s be honest though, we eat pizza more than once a week, haha)
I’d be lying if I said I didn’t have an ulterior motive for posting this recipe today.
I’m also posting my Air Fryer Pizza which is even faster than oven baking my quick pizza crust. AND it’s delicious. Crispy with melted vegan cheese AND my vegan pepperoni. Oh yes, I went there.
So while you CAN use store bought dough in the air fryer (I’ve tested it several times), I think it’s just that much better with homemade dough.
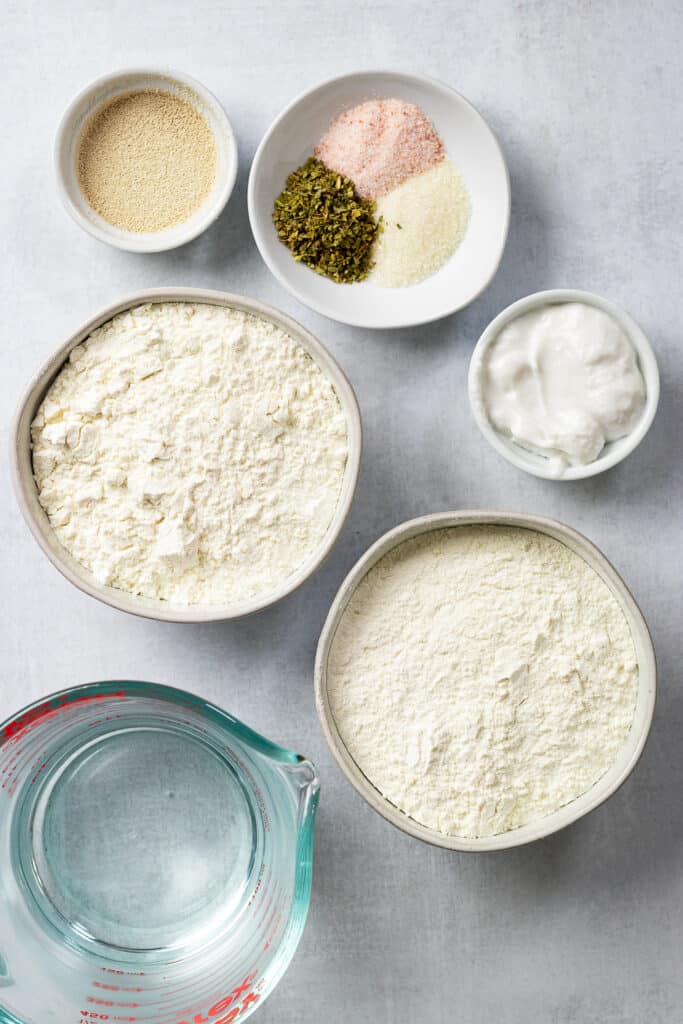
What You’ll Need
- All purpose flour: I have not tested this recipe with any other flour. I would venture a guess (based on experience with other recipes) that this recipe would work well with whole wheat flour (you may need extra liquid) or also with a good gluten-free flour. I have had success when baking with King Arthur Measure for Measure Gluten-Free Flour. I have also had good luck with Bob’s Red Mill 1:1 Gluten-Free Flour. Though I haven’t tried it myself, I’ve heard great things about Cup4Cup as well. Bread flour would give you a very chewy dough, kind of like a bagel.
- Quick rising yeast: Also known as rapid yeast, this quicker yeast is crucial to getting a faster rising dough. Regular active dry yeast will take at least an hour. I recommend Fleischman yeast or Red Star Premium yeast for best results. Store your yeast in a cool dark place (refrigerator is perfect), and replace it often. A dough that doesn’t rise is usually a result of dead yeast (though yeast can start off alive and be inadvertently killed with hot water or with direct salt contact).
- Sugar: You’ll need just a teaspoon of sugar to interact with the yeast. You won’t taste it in the final pizza dough.
- Salt: Salt is a great flavoring agent but is an important ingredient in baking. If using table salt you can use a little less than I use, but I typically recommend sea salt for this reason (table salt is just too salty for me, hah!).
- Flavor enhancers: Not necessary, but I like to add a pinch dried oregano into my dough. SO GOOD. You could also add dried basil leaves or you could try an Italian seasoning blend.
- Coconut milk/cream: Either oil or canned coconut milk/cream can be used as the dough conditioner in this recipe to make a delicious and soft pizza dough. I’d highly recommend not leaving it out entirely. I’ve had better results with the coconut, and no, you can’t taste it. But do what is best for you!
- Warm water: You’ll need warm water to mix your dough, but we’ll use it first to proof our yeast (this is important because you’ll learn if your yeast is dead or not. I hate getting halfway through the dough making and learning my yeast is dead, and then having wasted flour and my time). It should be warm to the inside of your wrist, but not hot enough to hurt or even bother you a little. If you would prefer to heat it to a precise temperature, the ideal range is 110°F (43°C) – 115°F (46°C) for dry yeast.

How to Make Quick Vegan Pizza Dough
- This recipe makes one 14-16 inch pizza or two 10-inch pizzas.
- Start by proofing the yeast. Add the warm water to a measuring cup and then add the yeast and sugar to it. Give it a quick mix with a small whisk or a fork and let it sit for 5 minutes.
- While the yeast is going, add your flour, salt, and any dried herbs you’d like to a large bowl and whisk it together. Create a well in the center.
- The yeast will have become a bit foamy if it is live. It won’t grow as much as regular active dry yeast (at least in my experience), but it will look a little bubbly.
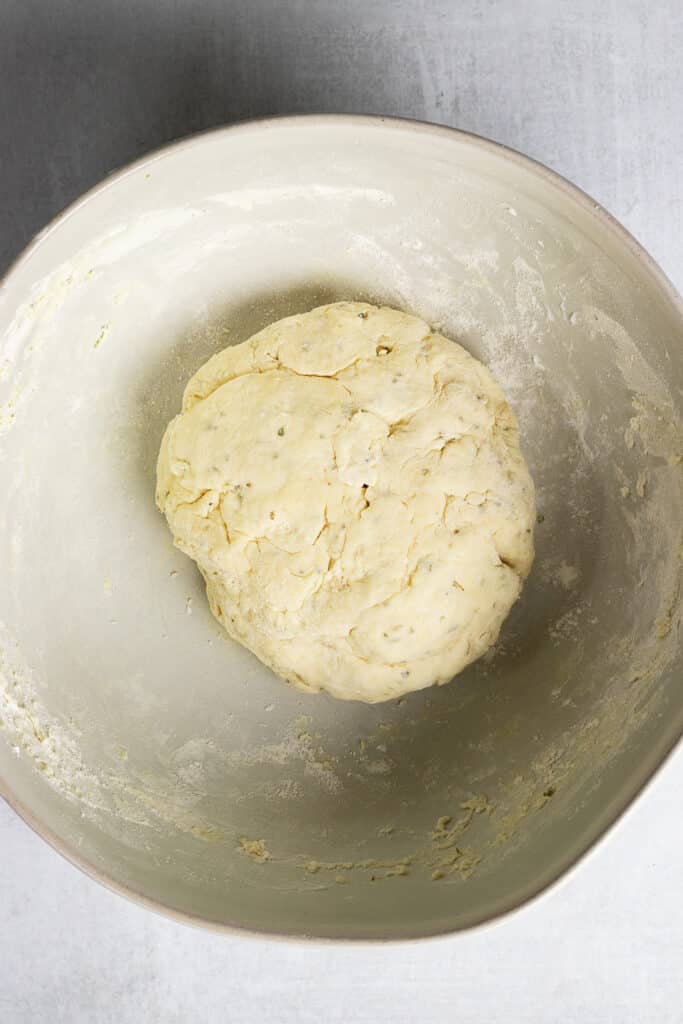
- Add the yeast mixture and the coconut milk/cream or oil to the flour and stir with a strong spoon until you have a moist and not sticky or crumbly dough. If it’s sticky, add a sprinkle of flour and mix with your hands. Don’t add a lot of flour though, just a pinch at a time until it’s perfect. If it’s crumbly and won’t come together, add warm water a tablespoon at a time, mixing with your hands until it comes together.
- Take a medium large bowl (at least twice the size of your dough, but ideally 3 times the size) and grease it with a bit of coconut cream/milk (and your fingers or a pastry brush).
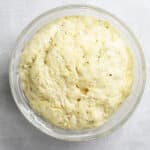
- Shape the dough into a smooth ball and plop it into the greased bowl. Cover the bowl with a damp kitchen towel or plastic wrap and place somewhere warm. I like to put it in the oven with the oven light on, but if you’re someplace warm or with a sunny window, that will work too. Let the dough rise for about 20-30 minutes, no need to be super exact.
- Punch down the dough and turn it out onto a lightly floured surface. Knead the dough around 4-6 times until it’s a smooth dough, about 10-15 seconds.
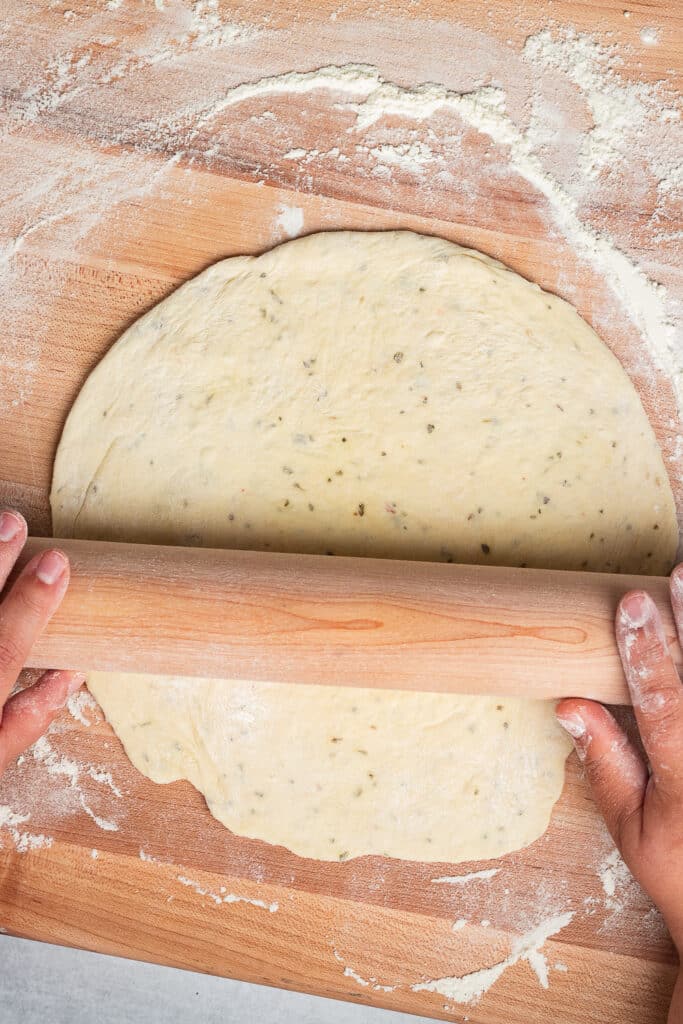
- It’s ready! If making pizza immediately, roll out the dough with a rolling pin or stretch it out by hand. If not ready, keep it lightly covered on the counter for up to an hour, or refrigerate wrapped tightly in plastic wrap for up to 5 days. Let dough come to room temperature (about 20-30 minutes) before using. You can also freeze the dough wrapped in plastic and then wrapped in freezer paper for up to 3 months. If using frozen dough, defrost and let come to room temperature and knead on a lightly floured surface for 30-40 seconds.
- Highly recommend using this in my air fryer pizza recipe, but I’ll be coming out with more uses for it soon!
More From Scratch Baking
I have fallen in love with baking over the past two years, and though I am not good at baking everything yet, I am learning!
I found that the idea of baking my own babka was way harder than actually baking them. Now I get regular requests to make them for my husband and neighbors (who enjoyed the many tests I did when developing this recipe)!
Here’s a few more awesome from-scratch baking recipes you can try.
- Vegan Challah (another super easy bread)
- Vegan Bagels
- Chocolate Chip Scones
- Vegan Babka
- Vegan Hamantaschen
- Matcha Pound Cake
- Vegan Irish Soda Bread
- Easy Pie Crust - try with my Vegan Pumpkin Pie
- Coconut Cake
- Cranberry Chocolate Chip Jumbo Muffins
- Banana Bread
- Easy Thick Crust Pizza Dough
Anything Else?
As always, I hope you love this recipe--I know I do, and Mr. Zardyplants does too. I told you how often we eat it, lol.
This quick vegan pizza crust is:
- Soft but chewy
- Quick and easy to make
- Inexpensive
- Tender with a light crust
- Flavorful
- Satisfying
- And perfect for pizza or other uses (coming soon)!
Let me know in the comments below if you make this recipe or tag me @Zardyplants on Instagram so I can see your beautiful recreations! If you tag me on IG, I will share your post in my stories :)
Also, one quick request: if you love how this recipe looks or tastes, please leave me a 5-star rating and a nice comment–ratings help more people find my recipes which helps me keep providing them! Thank you!
<3 Liz
Save this for later on Pinterest!

Quick Vegan Pizza Dough
- Total Time: 40 minutes
- Yield: One 16-inch pizza or two 10-inch pizzas 1x
- Diet: Vegan
Description
Easy, flavorful, and inexpensive, this Quick Vegan Pizza Dough will become your go-to for easy homemade pizza no matter when!
Ingredients
- ¾ cup warm water (110°F (43°C) – 115°F (46°C))
- 1 teaspoon organic cane sugar
- 1 packet (.25 oz / 2 ¼ teaspoons) quick rise yeast
- 2 cups unbleached all purpose flour (see note 1)
- 1 teaspoon sea salt
- 1 teaspoon dried oregano, optional (see note 2)
- 2 tbsp canned coconut milk/cream or oil of choice (see note 3)
Instructions
- Note: This recipe makes one 14-16 inch pizza or two 10-inch pizzas.
- Proof the yeast: Nothing is worse than finding out your yeast was old or dead when you’re already well into the baking process, so I recommend proofing your yeast as it only takes 5 minutes. Add the warm water to a measuring cup and then add the yeast and sugar to it. Give it a quick mix with a small whisk or a fork and let it sit for 5 minutes.
- Prep the dry ingredients: While the yeast is going, add your flour, salt, and any dried herbs you’d like to a large bowl and whisk it together. Create a well in the center.
- Check the yeast mixture: The yeast will have become a bit foamy if it is live. It won’t grow as much as regular active dry yeast (at least in my experience), but it will look a little bubbly.
- Mix the dough: Add the yeast mixture and the coconut milk/cream or oil to the flour and stir with a strong spoon until you have a moist and not sticky or crumbly dough. If it’s sticky, add a sprinkle of flour and mix with your hands. Don’t add a lot of flour though, just a pinch at a time until it’s perfect. If it’s crumbly and won’t come together, add warm water a tablespoon at a time, mixing with your hands until it comes together.
- Prep another bowl: Take a medium large bowl (at least twice the size of your dough, but ideally 3 times the size) and grease it with a bit of coconut cream/milk (and your fingers or a pastry brush).
- Let it rise: Shape the dough into a smooth ball and plop it into the greased bowl. Cover the bowl with a damp kitchen towel or plastic wrap and place somewhere warm. I like to put it in the oven with the oven light on, but if you’re someplace warm or with a sunny window, that will work too. Let the dough rise for about 20-30 minutes, no need to be super exact.
- Knead dough for a few seconds: Punch down the dough and turn it out onto a lightly floured surface. Knead the dough around 4-6 times until it’s a smooth dough, about 10-15 seconds.
- Pizza time: It’s ready! If making pizza immediately, roll out the dough with a rolling pin or stretch it out by hand.
- Or store it: If not ready, keep the dough lightly covered on the counter for up to an hour, or refrigerate wrapped tightly in plastic wrap for up to 5 days. Let dough come to room temperature (about 20-30 minutes) before using. You can also freeze the dough wrapped in plastic and then wrapped in freezer paper for up to 3 months. If using frozen dough, defrost and let come to room temperature and knead on a lightly floured surface for 30-40 seconds.
- Try this: Highly recommend using this in my air fryer pizza recipe, but I’ll be coming out with more uses for it soon!
Notes
- Note 1: I have not tested this recipe with any other flour. I would venture a guess (based on experience with other recipes) that this recipe would work well with whole wheat flour (you may need extra liquid) or also with a good gluten-free flour. I have had success when baking with King Arthur Measure for Measure Gluten-Free Flour. I have also had good luck with Bob’s Red Mill 1:1 Gluten-Free Flour. Though I haven’t tried it myself, I’ve heard great things about Cup4Cup as well. Bread flour would give you a very chewy dough, kind of like a bagel.
- Note 2: Not necessary, but I like to add a pinch dried oregano into my dough. SO GOOD. You could also add dried basil leaves or you could try an Italian seasoning blend.
- Note 3: Either canned coconut milk/cream or oil (same amount of each, 2 tablespoons) can be used as the dough conditioner in this recipe to make a delicious and soft pizza dough. I’d highly recommend not leaving it out entirely. I’ve had better results with the coconut, and no, you can’t taste it. But do what is best for you!
- Prep Time: 10 minutes
- Cook Time: 30 minutes
- Category: Entree, Ingredient
- Method: Baking
- Cuisine: American, Italian

joe grech
This is the second time I made this. I love it. I mix the yeast with the flour without proofing or anything.
Real Swanky
This turned out PERFECT! 475 for 14 min did it for me. Thank you. :-)