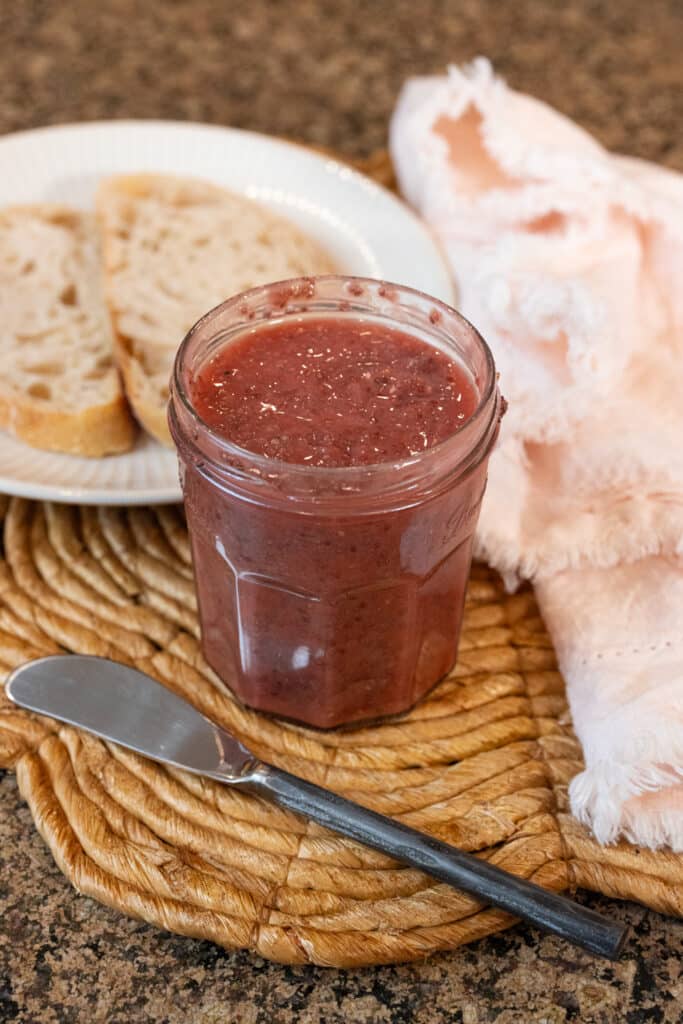
Quick and easy homemade Strawberry Chia Jam is absolutely delicious on toast, PB & J, and more. This recipe comes together in just 10 minutes with minimal effort and is way better than store-bought jam. This method works with any berries, fresh or frozen!
This post may contain affiliate links. See our disclosure policy for details.
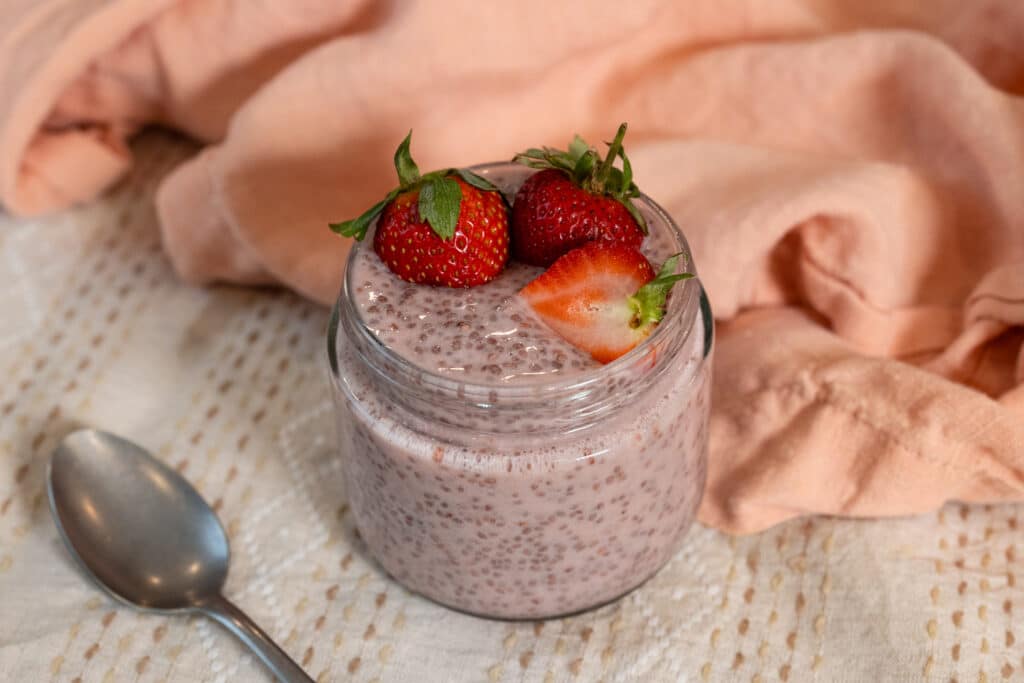
Hey Internet, this recipe is an oldie but a goodie, so we thought it deserved a little TLC. This homemade strawberry chia jam is super easy to make, and incredible on bread with peanut butter or almond butter. It's also great on rice cakes, crackers, English muffins, or on top of overnight oats; really anywhere you'd use traditional jam. And hey, it's strawberry season, so this is an easy way to enjoy extra strawberries.
One way we like to save money and eat a little more healthfully is to make as many of our own condiments, sauces, and seasoning blends as we can. Here are a few of our favorite homemade vegan condiments and salad dressings: Vegan Chipotle Sauce, Tofu Sour Cream, Oil-Free Hummus or Butter Bean Hummus, Tofu Cream Cheese, Vegan Tartar Sauce, Nut-Free Vegan Queso, Creamy Vegan Italian Dressing, Lemon Miso Tahini Dressing, and Vegan Tzatziki. And it's nice to make your own so you can control the amount of sugar and use whatever sweetener you like.
So, I'm wondering, have you hopped on the chia seed bandwagon? We really love making chia puddings; in fact we've recently even made a Strawberry Chia Pudding! Chia seed recipes are a great way to pack in lots of fiber and omega 3 fatty acids, plus they make it really easy to make a quick jam. When the chia seeds absorb liquid, they gel and make a great jammy texture.
What I really love about this easy chia seed jam recipe is that it can be made with fresh strawberries or frozen strawberries, so you can have it all year long. Do fresh strawberries pack more strawberry flavor? You bet. But frozen works just as well and, in fact, we used frozen in the photos/video for this blog post!
And whether you use fresh berries or frozen berries, you can make DELICIOUS chia strawberry jam that's loaded with flavor, fiber, and micronutrients like vitamin C. If you want to make small batches of jam, this is your recipe! You can also make a larger batch, but since we don't use any preservatives, you'll want to eat this recipe up in a week or so.

Why You'll Love this Strawberry Chia Seed Jam
- Simple Ingredients: All you need for this recipe is a few things: strawberries, water, chia seeds, and your sweetener of choice.
- Wholesome and Delicious: Instead of using tons of sugar like some store-bought jam brands, we sweetened our homemade strawberry chia jam with pure maple syrup. Other natural options include pitted Medjool dates or coconut sugar.
- Quick and Easy: All you need to do is cook the strawberries for a few minutes on the stovetop until they're soft and then blend them (or throw them in your food processor). Then just mix them with chia seeds in a small container (we like to use mason jars) and refrigerate. That's it!

Ingredients
Pick up the following basic ingredients for this strawberry chia jam recipe the next time you're at your local grocery store. See the recipe card at the bottom of this post for full ingredients, instructions, and accurate nutrition information (to the best of my ability; please consult your physician, registered dietitian, or healthcare professional if you have specific dietary needs or need to meet certain daily values of any nutrient). I give substitutions for the ingredients in the section below this one, so most people can still make this recipe!
- 10 Ounces Fresh or Frozen Strawberries: If using fresh, wash and cut the tops off of the strawberries (the tops are edible, actually, so if you're OK with putting them in your jam, go ahead!). You can roughly chop them if you want the cooking process to be even faster. If using frozen, you can buy either sliced or whole. Whole frozen will take longer than sliced, and frozen strawberries takes slightly longer than fresh but it's all pretty fast.
- ¼ Cup Filtered Water
- 2-3 Tablespoons Pure Maple Syrup: To taste!
- 2 Tablespoons of Chia Seeds
Substitutions
- Strawberries: You can use blueberries, blackberries, raspberries, or a simple combination of fruit like mixed berries (or any fruit you'd use for traditional homemade jam). And yes, fresh or frozen works for other fruits too.
- Maple Syrup: You can easily use agave or your liquid sweetener of choice. If using granulated sugar, coconut sugar, or pitted dates, we highly recommend cooking those in the pot with the berries before blending.
- Addition; Lemon Juice: If you want a little more brightness or acidity, add a teaspoon or two of lemon juice. Our frozen strawberries were somewhat tart so we opted not to add lemon juice.

How to Make Strawberry Chia Seed Jam
- Prepare Ingredients: Add the strawberries and water to a small saucepan. If you're using granulated sugar, coconut sugar, or pitted medjool dates, we highly recommend adding those in now.
- Heat: Turn the heat to medium and stir frequently. Cook for 5-10 minutes until fruit mushes easily with a fork.
- Blend: If you prefer a chunkier jam or don't have a blender or food processor, you can use a fork or potato masher for this part. Add the maple syrup (if using) and blend until smooth.
- Chia: Pour the mixture into a jar or a small glass container with a lid. Add the 2 tablespoons of chia seeds and stir well.
- Chill: Refrigerate at least 2 hours before making peanut butter and jelly sandwiches or whatever else you like.
- Store and Eat: Enjoy your jam for up to 5 days. If you won't use it in time, you can freeze it.
More Recipes Using Chia Seeds
- Strawberry Chia Seed Pudding
- Tiramisu Chia Pudding
- Peach Chia Pudding
- Pumpkin Chia Pudding
- Apple Pie Chia Pudding
- Lemon Blueberry Chia Pudding
- Chocolate Peanut Butter Chia Pudding
- Vegan and Gluten-free Chia Seed Puddings

3 Ingredient Vegan Strawberry Jam Sugar Free
- Total Time: 2 hours, 10 minutes
- Yield: 8 oz 1x
- Diet: Dairy-Free, Gluten-Free, Vegan, Vegetarian
Description
Quick and easy homemade Strawberry Chia Jam is absolutely delicious on toast, PB & J, and more. This recipe is ready in just 10 minutes!
Ingredients
- 10 ounces Fresh or Frozen Strawberries (see Note 1)
- ¼ cup Filtered Water
- 2-3 Tablespoons Pure Maple Syrup, To Taste (see Note 3)
- 2 Tablespoons of Chia Seeds
Instructions
- Prepare Ingredients: Add the strawberries and water to a small saucepan. If you're using granulated sugar, coconut sugar, or pitted medjool dates, we highly recommend adding those in now.
- Heat: Turn the heat to medium and stir frequently. Cook for 5-10 minutes until fruit mushes easily with a fork.
- Blend: If you prefer a chunkier jam or don't have a blender or food processor, you can use a fork or potato masher for this part. Add the maple syrup (if using) and blend until smooth.
- Chia: Pour the mixture into a jar or a small glass container with a lid. Add the 2 tablespoons of chia seeds and stir well.
- Chill: Refrigerate at least 2 hours before making peanut butter and jelly sandwiches or whatever else you like.
- Store and Eat: Enjoy your jam for up to 5 days. If you won't use it in time, you can freeze it.
Notes
- Note 1: If using fresh, wash and cut the tops off of the strawberries (the tops are edible, actually, so if you're OK with putting them in your jam, go ahead!). You can roughly chop them if you want the cooking process to be even faster. If using frozen, you can buy either sliced or whole. Whole frozen will take longer than sliced, and frozen strawberries takes slightly longer than fresh but it's all pretty fast.
- Note 2: You can use blueberries, blackberries, raspberries, or a simple combination of fruit like mixed berries (or any fruit you'd use for traditional homemade jam). And yes, fresh or frozen works for other fruits too.
- Note 3: You can easily use agave or your liquid sweetener of choice. If using granulated sugar, coconut sugar, or pitted dates, we highly recommend cooking those in the pot with the berries before blending.
- Note 4: If you want a little more brightness or acidity, add a teaspoon or two of lemon juice. Our frozen strawberries were somewhat tart so we opted not to add lemon juice.
- Cook Time: 10 minutes
- Category: Jam
- Method: Stovetop
- Cuisine: Breakfast
Leave a Reply