Tender and delicious, these Vegan Pierogi with Potato and Leek are the perfect appetizer or a side dish. Topped with caramelized onions or shallots, these little vegan dumplings are easier than you think and completely customizable as you can fill them with just about anything.

This post may contain affiliate links. See our disclosure policy for details.
Hey Internet, some recipes take a bit of perfecting to get right, since I’m making everything up as I go along. These vegan pierogi are SO AWESOME, but it took a little while for me to get this recipe just right.
However, the most recent time I made this recipe it was INCREDIBLE, so I know they are ready for you all.
I wish I could hand you one of these little vegan dumplings right now, through the screen, and let you try them. I guess I’ll just have to settle for pictures.
While you can technically fill pierogi with anything you like, potato and leek seems like a good classic combo. I added a little nutritional yeast to my filling to make it taste cheesy and dang, that is delicious.
I’ll be including the potato leek filling in my recipe below, however, I’ll also add in a little section on what other fillings you could use, traditional (like sauerkraut) or not so much (like veggie crumbles).
Usually when I make a culturally significant food to a culture other than my own, I try my best to acknowledge the origin and traditions of that culture.
Well, I’m going to do that here, but I have to say, pierogi are Polish and those are my people. To be fair, I’m kind of a mutt, so I’ve got a lot of people, lol.
Research led me to believe that pierogi first originated sometime in the 12th century, somewhere around the location now known as Poland, but I couldn’t find anything definitive or verified.
The truth is that pierogi are half moon shaped dumplings made with unleavened dough (no yeast required!), filled with various ingredients whether vegetable or meat.
Many, many cultures around the world make similar dumplings that just go by different names. In my Jewish culture, we’d call them kreplach (though these are usually triangular).
Anyway, this recipe today is for vegan pierogi, which is a slight trick as pierogi dough usually contains butter, eggs, and sour cream or a cream-based cheese like ricotta. However, I believe I’ve managed to create a delicious pierogi dough without any animal products, and with significantly less fat.
They also make a great snack or meal for kids. If you're looking for more of that sort of thing, check out my list of 50+ vegan snacks for kids and 43 vegan meals (kid friendly).
Read on to see how to make your own veganized pierogi.

What You’ll Need
To start, let’s discuss the dough. If you want to make pierogi, you’ll need the following staples: flour, salt, coconut cream (the solid part of a can of coconut milk or cream) or vegan butter, vegan sour cream (homemade or store bought), and an egg replacer (more below).

For the flour, I recommend using unbleached all purpose flour.
If you want to make gluten free pierogi, I recommend using a high quality cup for cup flour like Bob’s Red Mill 1:1 Gluten Free Flour or King Arthur Baking Company Measure for Measure Gluten Free Flour. I always use either of these flours when baking gluten-free and I think they’d work in this recipe.
As far as the coconut cream or vegan butter goes, this recipe needs fat to create a nice enriched dough. Either will work--I just usually use coconut. It won’t make the pierogi taste like coconut, trust me.
If you’re using canned coconut, which is very convenient because it’s shelf stable, I recommend buying canned coconut cream as opposed to canned coconut milk. You usually will get more of the solid stuff for your money this way.
But, vegan butter will work just as well, just soften it a bit before attempting this recipe.
For sour cream, both the flavor and the texture help enrich the dough to make pierogi. I have a 3 ingredient, 2 minute vegan sour cream recipe, or you’re welcome to use store bought instead.
Tofutti makes a nice sour cream. I’d venture to guess that plain unsweetened vegan yogurt would also work fine here. You could also use a vegan ricotta, but I haven’t tried it.
Finally, for the egg replacer, I used Bob’s Red Mill Egg Replacer which is what I use frequently instead of flax eggs. Flax eggs are great, but they’re a little dense.
The commercial egg replacer does a great job of binding and enriching the dough without weighing it down. It also just visually disappears (unlike flax) and is shelf stable.
For filling, I’ll include a section below suggesting lots of different fillings, but today we’re going to use what I mention in the title of this post: potato and leek.

I used vegan mashed potatoes, though riced potatoes are more traditional.
I have a comically tiny kitchen so I need to be very careful about how many kitchen appliances and gadgets I have around. I just couldn’t justify a potato ricer.
I’ve heard you can also grate cooked potatoes but that sounded a bit too much for me. I used mashed potatoes and it turned out awesome. You do you.
Leeks are a member of the onion family and have a light and delicate yet delicious savory flavor. You can use onion, green onion, shallot, or omit if you like, but I highly recommend leek.
I just sauteed them with a little water, then mixed them in with my mashed potatoes.
I seasoned this mixture with nutritional yeast for a little cheesiness, a pinch of sea salt, and a couple tablespoons of coconut milk/cream from the can I already had open (you can substitute any plant milk or just the water you cooked the potatoes in).
Other Pierogi Fillings
There are so many different directions you could take a pierogi. I’m going to suggest mostly savory options, though you could try sweet options like cooked apple and cinnamon (yum!).
- Potato and vegan cheese (“Ruskie”)
- Sauteed mushrooms and garlic
- Spinach (try adding artichoke!)
- Sauerkraut (very traditional)
- Vegan meatless crumbles or commercial like Beyond Meat
- Vegan ricotta
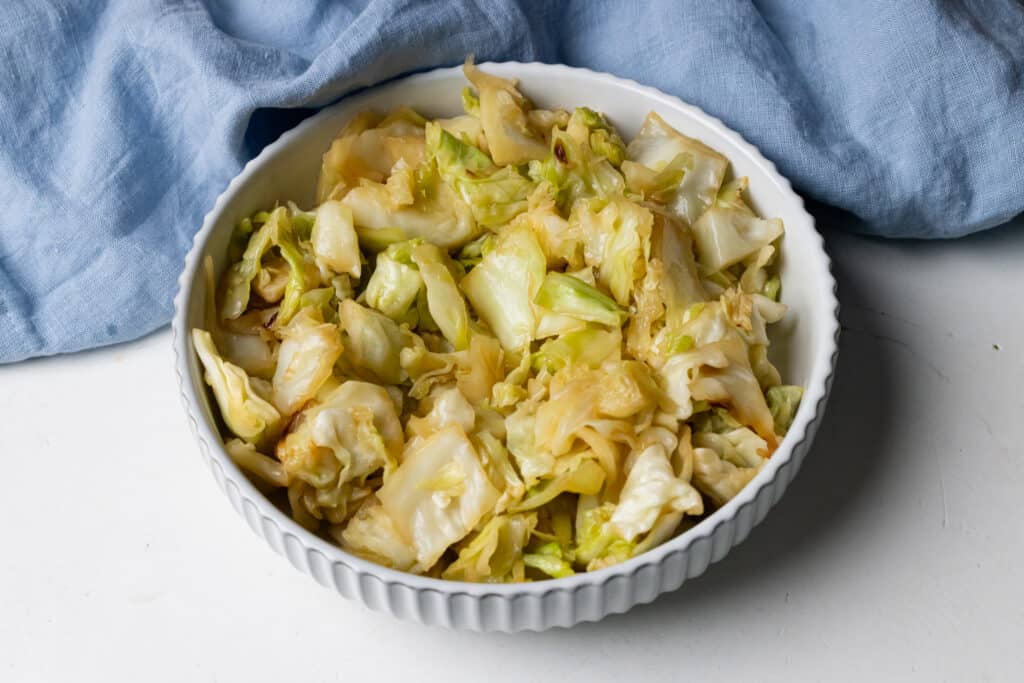
- Cabbage and onion
- Vegan feta and olives
- Lentils
- Winter squash like pumpkin or butternut
- Sweet potato
- Blueberry, strawberry, plum, or apple

Tips for Making Perfect Vegan Pierogi
Making pierogi or dumplings is honestly way easier than it sounds or seems. Don’t get frustrated trying to make them perfect, and have fun with it!
Filling the dough and pinching it shut can be a fun activity for kids or friends as well!
First, let’s make the dough.
- Add the flour and salt to a large bowl and stir to combine.
- Make a well in the center and add your prepared vegan egg replacer (for Bob’s Red Mill Egg Replacer, just mix 2 tablespoon of the powder with 4 tablespoon of water and let it sit for 3 min), vegan sour cream, and coconut cream or softened vegan butter.
- Combine with a strong spoon, spatula, or your hands until you have a somewhat sticky and rough dough ball.
- If your dough is too try, add a touch more vegan sour cream or coconut cream. If it is too wet, sprinkle in a little more flour. Either way, don’t add too much of either thing or you’ll end up overcompensating.
- Flatten the dough ball somewhat and wrap tightly in plastic wrap or a clean kitchen towel. Place in the fridge and allow to chill for at least an hour, or up to 24 hours (if you want to make the pierogi the next day).
While the dough is chilling, we can start on our filling.
- Dice and boil potatoes (you don’t need to dice them but this makes the boiling time shorter). As soon as you can easily mush or pierce them with a fork, remove from heat. Use a slotted spoon to transfer the potatoes to a medium bowl, or drain them in a colander but reserve some of the starchy boiling water. This can be mixed into the potatoes while mashing them which creates a nice creamy texture. I follow the same process as in my vegan mashed potatoes recipe.
- While the potatoes are cooking, dice up a small leek (or half a large leek), and saute over medium high heat with a touch of water as needed (or oil, if you prefer) in a large nonstick skillet. It took me about 6-7 minutes to get nicely caramelized leeks. You can also use onion or shallot, but the leek is a really nice flavor.
- When they are cooked, gently stir them into the mashed potatoes and add any seasoning you like--I used sea salt and nutritional yeast. I also added 2 tablespoons of coconut cream from the can I already had open, but you can use vegan butter, any non-dairy milk you have in the fridge, or just a bit of the starchy cooking water you boiled the potatoes in.

Once the dough is chilled and the filling is made, it’s time to construct our pierogi!
- Set up a workstation with a lightly floured work surface (I use a Boos board), your dough, a rolling pin, a bowl of extra flour, the bowl of filling, a spoon, a fork, and a circle cutter of some sort. I used a 2.5” biscuit cutter but you can use a cookie cutter or a floured glass. I recommend a diameter between 2 and 3”.
- Also, start a large pot of salted water boiling if you are cooking these right away (they can be refrigerated or frozen at this stage if you want to save them for later).
- Roll out the dough so that it’s an even thickness of about ¼”. It doesn’t matter what shape, as long as the dough is fairly even. You may want to flour the top of dough and/or your rolling pin if you notice any sticking.
- Like cookies, use your round cutter or glass to cut as many circles as you can fit. We can re-roll later.
- Take one of the circles at a time and use your spoon to add a small amount of filling. The amount of filling you need will depend on the size of your circle and your dexterity. I don’t have a ton of dexterity, especially in my left hand due to a disability, so I ended up using about a level teaspoon of filling per circle.

- Now fold over one edge of the circle and pinch the edges closed with your fingers. If the dough is sticking to your fingers instead of itself, try dipping your fingers in a little extra flour from your bowl. Use the tines of your fork to crimp both sides of the sealed edge of each pierogi. This keeps it from coming apart. Set aside. If you’re freezing, freeze these on a tray until frozen, then you can add them to a freezer-safe container or bag and store frozen for up to 3 months. When ready to cook frozen pierogi, simply drop in boiling salted water and cook until heated through. Finish on a skillet (see below) if desired.

- Once you get 8-10, drop them in the boiling water and set a timer for about 5 minutes. Go back to work on your other pierogi. Once the timer goes off, transfer each pierogi to a colander to drain.
- Once you’ve run out of your first batch of circles, use your hands to mush the dough scraps together and re-roll. You may need to roll it in a bit of flour to make it less sticky. If you find it too dry, wet your hands with warm water and work the dough a bit to moisten it. Repeat this process until you’ve used your dough. You can save any tiny scraps in the freezer for dropping in soups, if you like.
- After all pierogi are boiled, saute/caramelize some finely diced shallots or onions in a large non-stick skillet, then scrape them into a bowl and add as many pierogi into the skillet as you can comfortably fit. You can use a bit of oil or vegan butter if you like, but I just used a splash of water. Cook each side until lightly browned and place on a plate.
- Serve with the caramelized shallots or onions, fresh parsley, and some more vegan sour cream and/or applesauce. Enjoy!
More Vegan Appetizers
Like vegan appetizers -- or just snacks? Me too! Here’s a few of my favorites:
- Vegan Brie
- Vegan Cheddar
- Spinach Artichoke Latkes
- Vegan Garlic Bread
- Mushroom Lentil Pate (Vegan Chopped Liver!)
- Teriyaki Cauliflower Wings
- Creamy Oil-Free Hummus
- Spinach Artichoke Dip
- Nacho Fries / Loaded Potato Nachos
Anything Else?
As always, I hope you love this recipe--I know I do, and Mr. Zardyplants does, too. He says these are so much better than store-bought and ate half of them in minutes. The only bad thing about these pierogi is how fast they disappear!
These vegan pierogi are:
- Tender but a lil’ crisp on the outside
- Flavorful
- Starchy
- Comforting
- Savory
- And perfect for a party with family, friends, or a party in your mouth!
Let me know in the comments below if you make this recipe or tag me @Zardyplants on Instagram so I can see your beautiful recreations! If you tag me on IG, I will share your post in my stories :)
Also, one quick request: if you love how this recipe looks or tastes, please leave me a 5-star rating and a nice comment–ratings help more people find my recipes which helps me keep providing them! Thank you!
<3 Liz
Save this for later on Pinterest!

Follow me on Social Media!
Follow my blog with Bloglovin
Vegan Pierogi with Potato and Leek
- Total Time: 35 minutes
- Yield: 24 Pierogi 1x
- Diet: Vegan
Description
Tender and delicious, these Vegan Pierogi with Potato and Leek are the perfect appetizer. These vegan dumplings are easier than you think!
Ingredients
Dough
- 250g (1 ½ cups + 1 tbsp) unbleached all purpose flour (see note 2)
- 1 tsp sea salt
- 2 tbsp Bob’s Red Mill Egg Replacer + 4 tablespoon water (see note 3)
- ½ cup vegan sour cream (see note 4)
- ¼ cup coconut cream/solid milk from can OR softened vegan butter
Filling
- 1 cup mashed or riced potatoes
- 1 small (or ½ large) leek, diced (see note 5)
- 2 tbsp nutritional yeast
- ½ tsp sea salt
Toppings, optional
- 1 cup diced shallot or onion for serving
- Extra vegan sour cream and/or applesauce for serving
- Chopped parsley for garnish
Instructions
- Make the dough: Add the flour and salt to a large bowl and stir to combine. Make a well in the center and add your prepared vegan egg replacer (for Bob’s Red Mill Egg Replacer, just mix 2 tablespoon of the powder with 4 tablespoon of water and let it sit for 3 min), vegan sour cream, and coconut cream or softened vegan butter. Combine with a strong spoon, spatula, or your hands until you have a somewhat sticky and rough dough ball. If your dough is too try, add a touch more vegan sour cream or coconut cream. If it is too wet, sprinkle in a little more flour. Either way, don’t add too much of either thing or you’ll end up overcompensating.
- Refrigerate: Flatten the dough ball somewhat and wrap tightly in plastic wrap or a clean kitchen towel. Place in the fridge and allow to chill for at least an hour, or up to 24 hours (if you want to make the pierogi the next day).
- Make the mashed potatoes: Dice and boil potatoes (you don’t need to dice them but this makes the boiling time shorter). As soon as you can easily mush or pierce them with a fork, remove from heat. Use a slotted spoon to transfer the potatoes to a medium bowl, or drain them in a colander but reserve some of the starchy boiling water. This can be mixed into the potatoes while mashing them which creates a nice creamy texture. I follow the same process as in my vegan mashed potatoes recipe.
- Cook the leeks: While the potatoes are cooking, dice up a small leek (or half a large leek), and saute over medium high heat with a touch of water as needed (or oil, if you prefer) in a large nonstick skillet. It took me about 6-7 minutes to get nicely caramelized leeks. You can also use onion or shallot, but the leek is a really nice flavor.
- Make the filling: When they are cooked, gently stir them into the mashed potatoes and add any seasoning you like--I used sea salt and nutritional yeast. I also added 2 tablespoons of coconut cream from the can I already had open, but you can use vegan butter, any non-dairy milk you have in the fridge, or just a bit of the starchy cooking water you boiled the potatoes in.
- Set up: Set up a workstation with a lightly floured work surface (I use a Boos board), your dough, a rolling pin, a bowl of extra flour, the bowl of filling, a spoon, a fork, and a circle cutter of some sort. I used a 2.5” biscuit cutter but you can use a cookie cutter or a floured glass. I recommend a diameter between 2 and 3”.
- Boil water: Also, start a large pot of salted water boiling if you are cooking these right away.
- Roll and cut the dough: Roll out the dough so that it’s an even thickness of about ¼”. It doesn’t matter what shape, as long as the dough is fairly even. You may want to flour the top of dough and/or your rolling pin if you notice any sticking. Like cookies, use your round cutter or glass to cut as many circles as you can fit. We can re-roll later.
- Fill pierogi: Take one of the circles at a time and use your spoon to add a small amount of filling. The amount of filling you need will depend on the size of your circle and your dexterity. I don’t have a ton of dexterity, especially in my left hand due to a disability, so I ended up using about a level teaspoon of filling per circle.
- Shape pierogi: Now fold over one edge of the circle and pinch the edges closed with your fingers. If the dough is sticking to your fingers instead of itself, try dipping your fingers in a little extra flour from your bowl. Use the tines of your fork to crimp both sides of the sealed edge of each pierogi. This keeps it from coming apart. Set aside. Once you’ve run out of your first batch of circles, use your hands to mush the dough scraps together and re-roll. You may need to roll it in a bit of flour to make it less sticky. If you find it too dry, wet your hands with warm water and work the dough a bit to moisten it. Repeat this process until you’ve used your dough. You can save any tiny scraps in the freezer for dropping in soups, if you like. water and cook until heated through. Finish on a skillet (see below) if desired.
- Freezing instructions: If you’re freezing, freeze uncooked pierogi on a tray until frozen, then you can add them to a freezer-safe container or bag and store frozen for up to 3 months. When ready to cook frozen pierogi, simply drop in boiling salted water and cook until heated through. Finish on a skillet (see below) if desired.
- Boil pierogi: Once you get 8-10, drop them in the boiling water and set a timer for about 5 minutes. Go back to work on your other pierogi. Once the timer goes off, transfer each pierogi to a colander to drain.
- Cook in skillet: After all pierogi are boiled, saute/caramelize some finely diced shallots or onions in a large non-stick skillet, then scrape them into a bowl and add as many pierogi into the skillet as you can comfortably fit. You can use a bit of oil or vegan butter if you like, but I just used a splash of water. Cook each side until lightly browned and place on a plate.
- Serve: Serve with the caramelized shallots or onions, fresh parsley, and some more vegan sour cream and/or applesauce. Enjoy!
- Store: Refrigerate leftover pierogi (what’s that?) in an airtight container for up to 5 days. I recommend only freezing uncooked pierogi (see freezing instructions above).
Notes
- Note 1: Prep and cooking time estimates do not include refrigeration time since it’s variable.
- Note 2: If you want to make gluten free pierogi, I recommend using a high quality cup for cup flour like Bob’s Red Mill 1:1 Gluten Free Flour or King Arthur Baking Company Measure for Measure Gluten Free Flour. I always use either of these flours when baking gluten-free and I think they’d work in this recipe.
- Note 3: I used Bob’s Red Mill Egg Replacer which is what I use frequently instead of flax eggs. Flax eggs are great for some things, but they’re a little dense. The commercial egg replacer does a great job of binding and enriching the dough without weighing it down. It also just visually disappears (unlike flax) and is shelf stable.
- Note 4: For sour cream, both the flavor and the texture help enrich the dough to make pierogi. I have a 3 ingredient, 2 minute vegan sour cream recipe, or you’re welcome to use store bought instead. Tofutti makes a nice sour cream. I’d venture to guess that plain unsweetened vegan yogurt would also work fine here. You could also use a vegan ricotta, but I haven’t tried it. If you cannot eat soy, either buy a vegan sour cream that does not contain it, or make my vegan sour cream recipe but substitute a cup of soaked cashews or sunflower seeds instead of tofu.
- Note 5: Leeks are a member of the onion family and have a light and delicate yet delicious savory flavor. You can use onion, green onion, shallot, or omit if you like, but I highly recommend leek. I just sauteed them with a little water, then mixed them in with my mashed potatoes.
- Prep Time: 25 minutes
- Cook Time: 10 minutes
- Category: Snack, Side
- Method: Stove Top
- Cuisine: Polish


Kate
I cannot wait to try this recipe. I wonder, Could you use whipped aquafaba in place of the egg replacer?
💚 Liz
I think that should work just fine. Write back if you try it!
Carol K. Howell
Beautiful and delicious version of classic dish. In the same family as ravioli, empanadas, dim sum dumplings, etc.
Michelle
This was delicious. Tried it with your vegan sour cream and tomato sauce.
Sandy Lynn Stevens
Delicious and surprisingly easy - the dough was very easy to work with and tasted very tender
Avi
Finally got around to making this! It's amazing! Easy enough, and a fun recipe to make with others. The sour cream with silken tofu recipe worked great, but since the tofu comes in packages of 12 oz instead of 8 oz, I did the whole pack and 4+ Tbsp of lemon juice.
Only true problem was there wasn't enough for leftovers. :)